Subtleties when starting the UAZ 469 engine
Starting a cold engine at positive temperature
Starting the engine at a positive temperature has its own characteristics. First you need to set the gear lever to neutral, pull out the entire carburetor choke control knob about halfway and immediately after that, turn off the clutch and turn on the ignition. In this case, the starter must be kept on until the engine itself is started. But don't hold it like that for more than five seconds. The intervals between switching on the starter must be at least 10 seconds.
After the engine has started, you must immediately release the ignition switch key. After that, push the choke control knob down to the position that will provide the lowest engine speed. Now warm up the engine and gradually lower the control knob of this air damper until it stops. It is worth noting that the temperature of the coolant of the engine you have already warmed up should be at least 60 degrees.
Let us immediately pay attention to important subtlety with this heating. In no case, when operating the UAZ 469, for accelerated warming up, drive the car at a high engine speed
Starting a cold engine at temperatures up to minus 15 degrees
In this case, you will first need to disable oil radiator. After that, close the blinds of this radiator and install a special insulating cover for the radiator lining.
Next, you will need to turn the handle crankshaft engine. Turn it about four turns. After you need to pull the carburetor choke control knob to the maximum. Next, you need to perform the same steps as when starting the engine at a positive temperature.
Starting a cold engine at temperatures below minus 15 degrees
We will immediately draw your attention to what needs to be launched cold engine only after it has been preheated by the preheater. But if suddenly at the time of launch you will not have preheater, then you can simply pour hot water through the cooling system
If you are preheating with hot water, then it must be poured into the radiator. Remember to drain the water as it cools from the cooling system. This can be done through a special drain valve. Just remember that after the system needs to be filled with hot water again. Thus, warm up the entire system until the engine crankshaft begins to rotate. Rotation should be light enough with good compression in the cylinders.
It is also recommended to warm up the inlet pipeline with hot water, while water must be poured onto it carefully, in a thin stream, so that the heat can be transferred to the pipeline. After that, you need to turn the fan by hand in order to eliminate possible freezing of the pump impeller in the cooling system. Further, everything must be done according to the same principle as described in the previous section about starting the engine at temperatures up to minus 15 degrees.
Starting a hot UAZ 469 engine
Here, too, there are a couple of subtleties that you should always remember. When starting a hot engine, do not need to cover air damper carburetor. It is also not advisable to press the throttle pedal hard, as this can lead to an over-rich combustible mixture and will not give you the opportunity to start the engine.
But if still combustible mixture turned out to be over-enriched, then you need to blow all the cylinders with air. To do this, gently press the pedal throttle valve carburetor to the maximum. After very quickly turn the starter crankshaft in the engine a couple of turns.

Platform for conveyor models
The famous Loaf, thanks to its all-metal body, the 452 model served as a platform for creating a whole line of vehicles:
- UAZ 2206 - a minibus designed for 11 people;
- UAZ 3962 - a car for the ambulance service;
- UAZ 396255 - civil modification of an ambulance for the needs of rural areas;
- UAZ 39099 - promoted under the name "Farmer". Designed for 6 passengers and 450 kg of cargo;
- UAZ 3741 - a van for transporting 2 passengers and 850 kg of cargo;
- UAZ 3303 - flatbed car with an open body;
- UAZ 3904 is a cargo-passenger version that combines the convenience of an all-metal body for passengers and an open body for cargo.

Features of the modification with multifunctional control
Variations with the car body did not affect it too much technical equipment. But when the changes affected the governing bodies, they underwent modernization:
- Interior wiring for UAZ;
- Steering column for turning and outdoor lighting;
- The control unit for the operation of electric wipers on the instrument panel.

Reason for modernization

On cars of the UAZ family, the wiper control unit windshield located on the instrument panel. And since this did not meet the safety requirements, then on all subsequent modifications:
- it was replaced with a more modern multifunctional unit located directly on the steering wheel;
- began to install a new instrument panel.

Self-modernization
Cars of new releases already have a multifunctional control unit in the database. But the owners of early releases can convert the car to modern safety requirements with their own hands.
This will require:
- original wiring
UAZ 2206 - as the most suitable for self-rework; - Factory scheme-instruction
, allowing you to correctly connect the steering column switches to the standard circuit; - Desire for quality installation
.

The work algorithm will be as follows:
- Disconnect the battery;
- We remove the control unit from the instrument panel;
- We disconnect the wires, referring to their compliance with the factory diagram in fig. one;
- Remove the stock switches from the steering wheel column.
For alteration, you will need to purchase several new parts:
- A block of multifunctional paddle switches from the UAZ 390995 model;
- Relay for the wiper circuit (best suited from the VAZ model, as well as wiring 2112 connecting the relay and the switch block);
- Contact pads in the amount of 3 pieces (one 8-pin for the side of the steering column switches and two 6-pin for the relay and the standard adapter).


Let's start the installation:
- We replace the standard connector with a new one;
- We cut the wire 4x4 (indicated in Fig. 2 with a red cross);
Motorists-improved modernization scheme
Motorists improved the rework scheme proposed by the manufacturer by making some changes to it (in Fig. 3):
- A variable resistor R = 10K was introduced into the circuit, due to which the pause in the intermittent operation of the wipers can be smoothly changed from 4 s to 15 s;
- Connect the resistor in such a way that the countdown of the operating mode starts from the moment the brush motor stops.
Conclusions: cars of the UAZ family are not only unitary multi-purpose SUVs, but also easy-to-maintain vehicles. Almost any car owner, armed with knowledge and color wiring diagrams, is able not only to restore a failed node, but also to carry out a useful modernization of the car and its individual elements.
header
One of the most common problems domestic cars is a breakdown of any electrical appliances, this will help you figure out the wiring diagram. The only solution to this problem will be to check the condition of the fuses. The topic of today's article will be the electrical circuit of the UAZ Loaf car on an injector-type engine.
So, this article provides answers to such fairly common questions:
- What is the wiring diagram on a UAZ Loaf of an engine type injector?
- How is the electrical circuit of a UAZ Loaf car arranged?
- Where are the fuses located on a UAZ Loaf car of an injector-type engine?
- Assembly block repair.
Meet UAZ 452
The car was a cargo-passenger version vehicle off-road with wheel formula 4×4. He mastered the production of the Ulyanovsk Automobile Plant model back in 1965.
- As a traffic police car;
- As a fire engine;
- ambulance;
- grocery store;
Electronic components
For reference: The instruction provided for a regular check of contacts. When oxidized, they should have been cleaned with sandpaper.
power unit
- Protected from dust and dirt;
The previously used motor from Pobeda was replaced with a more modern engine from the 21st "Volga". This was facilitated by the launch of a production line at the Zavolzhsky Motor Plant in 1964.
A striking example of comprehensive testing "Pills"
What is included in the electrical circuit
Electronic components
Engine compartment
 AUZ car engine compartment
Passive safety
Specifications UAZ 469
Before proceeding to the intricacies of operating a car, it would be nice to know about its technical characteristics.
Equipped with an SUV 4-cylinder carbureted engine UMZ-451MI with a volume of 2.5 liters. Such an engine UAZ 469 is aggregated with a 4-speed mechanical box gears (with synchronizers in 3rd and 4th gears). Engine power reaches 75 Horse power at a torque of 2200 - 2500 rpm.

A-72 or A-76 gasoline can be used as fuel. The car has two fuel tanks 39 liters each, and fuel consumption at a speed of 90 km / h is 16 liters per 100 km. The maximum speed at gross weight- 100 km / h.
Since the engine is the heart of any car, then it would be more logical to consider the intricacies of starting such a unit under various weather conditions, especially if your UAZ 469 is new.
Gearbox removal process
Repair of a checkpoint on a UAZ 452 is quite possible to do it yourself. This requires:
- a set of wrenches, including the wrenches needed to tighten the nuts;
- screwdrivers;
- hammer;
- chisel;
- pliers.
Dismantling algorithm.
The car must be on level ground. It is necessary to drain the oil from the two boxes by unscrewing the drain plugs. Next, the front seats, hatch halves, clutch release fork, transverse frame, gear levers from the boxes are removed.
The speedometer shaft, suspension mounts in the undercarriage, levers are subject to removal brake system. As a result, an exit to the clutch housing opens. A box is fixed on it with fastening nuts, which must be unscrewed, then the UAZ gearbox is carefully pulled out along with transfer gearbox before the splined shaft comes out of the flywheel. The driver will need an assistant to remove the box.
As soon as the disassembly into individual component parts has taken place, the box must be washed in kerosene and dried. All component parts are checked for integrity. First of all, this concerns the crankcase, shafts. If the threads on the shafts are damaged, they must be replaced. It seems dangerous to operate the machine if the gears are chipped.
Thus, the timely repair of the UAZ "loaf" checkpoint helps to extend the life of the box.
Meet UAZ 452
The car was a cargo-passenger version of a cross-country vehicle with a 4 × 4 wheel arrangement.
He mastered the production of the Ulyanovsk Automobile Plant model back in 1965.
You can evaluate its capabilities by watching the following video:
UAZ 452 is capable of carrying cargo weighing up to 700 kg in the back. In addition, it can tow a trailer weighing 850 kg. The vehicle has become very popular not only in Russian off-road conditions, but has also been successfully used in large cities in various capacities (pictured in the article).
In particular:
- As a traffic police car;
- As a fire engine;
- ambulance;
- grocery store;
- Public utility vehicle, etc.

Electronic components

Wiring UAZ 452 was a simple single-wire circuit.
Structurally, she had the following solutions:
- The role of the second wire was played by a metal body and units and assemblies attached to it;
- All electronic components and actuators had a "-" displayed on the case. The price of such a decision justified the imperfection of the scheme.
power unit
The engine compartment is located directly in the passenger compartment, as this is due to its design.
Access to components and assemblies is also carried out from the passenger compartment, by removing the cover, which:
- Provided protection for the driver and passengers from the penetration of exhaust gases;
- Protected from dust and dirt;
- It served as an additional heating element (passive - from heating).

The previously used engine from Pobeda was replaced with a more modern engine from the 21st Volga. This was facilitated by the launch of a production line at the Zavolzhsky Motor Plant in 1964.
Passive vehicle safety
The design of the "Baton" with a cabover layout also initially raised a number of questions regarding safety. However, a series of crash tests conducted back in 1971 at the Dmitrovsky training ground proved that in most emergency situations, the driver and passengers of the UAZ 452 have a chance to avoid injury.

What is included in the electrical circuit
What features does automotive electrics have on old cars manufactured by the Ulyanovsk Automobile Plant?
Electronic components

The UAZ 452 wiring diagram itself is quite simple - single-wire.
By its design, the wiring diagram of UAZ390995 or another model is characterized by the following solutions:
- The body of the vehicle is used as the mass.
- Any electrical equipment of the old-style circuit on the UAZ 409 or another model, as well as actuators, are equipped with a negative terminal that is connected to the car body. According to experts, in general, this scheme is imperfect.
According to the operating instructions for electrical equipment, the driver must from time to time diagnose the condition of the integrity of the contacts. We are also talking about their oxidation. If the driver notices the presence of oxidation on the terminals, he must process them using fine-grained sandpaper.
Engine compartment
In this case, the engine compartment is located directly in the passenger compartment in accordance with the design of the machine.
Self access to wiring diagram and other mechanisms and units are made from the salon, as a result of dismantling the cover, which:
- Designed to protect the motorist and passenger from exhaust gases entering the passenger compartment.
- Allows you to protect the interior of the car from the penetration of dirt and dust.
- Performs the function of an additional heating device, in particular in a passive way, as a result of heating.

Previously, the UAZ 396255 and other models with a carburetor used an engine from the legendary Pobeda, which was later replaced by a more advanced and modern unit. In particular, the engine is from the Volga. This decision at one time, back in 1964, was facilitated by the serial launch of the production line at the ZMZ enterprise. Despite the fact that many domestic motorists claim that the UAZ 390994 scheme, the injector in the engine compartment is located in an inconvenient place due to the lack of a hood, this is not so. Dozens of years of operation have proven that the absence of a hood in no way affects the diagnosis and maintenance of a car.
Passive safety
The very design of the domestic Loaf with the absence of a hood at first raised many questions in terms of the safety of the driver and passengers. As a result of several dozen crash tests that were carried out back in the early 70s of the last century, it was found that the car is no less safe when compared with other domestic cars. As the results showed, in the event of an accident, both the driver and the passengers of the car have a good chance of avoiding injuries in an accident.
Subtleties of maintenance UAZ 469
During the operation of each car, its technical condition deteriorates, the UAZ 469 car is also no exception. In order to increase the service life of the machine and prevent malfunctions in time, it is necessary to know the subtleties of its maintenance, namely the subtleties of maintenance of all available mechanisms.
Let's look at some of the most important points:
First of all, pay attention to the frequency of oil changes. It is recommended to do this every 5000 kilometers.
At the same time, during the operation of an SUV, a decrease in oil by 10-12 mm relative to the lower edge of the filler hole is allowed.
It is also necessary to periodically carry out maintenance of the gas distribution mechanism, which consists in cleaning the valves from carbon deposits and grinding them.
The oil filter is changed by unscrewing it from the cylinder block counterclockwise. Before installing a new oil filter its o-ring needs to be lubricated engine oil. The new filter is wrapped to a degree that excludes oil leakage.
The crank mechanism of the car needs to tighten the cylinder nuts every 1000 km. run.
The engine cooling system must be filled with soft fresh water with a low salt content and during operation periodically remove scale and debris from the system, as well as adjust the tension of the fan belt.
The clutch mechanism also needs maintenance. In addition to the fact that it is necessary to lubricate the clutch release bearing located with right side crankcase, it is also necessary after driving on dirty roads clean the bottom of the crankcase.
As for the maintenance of the gearbox, it all comes down to the periodic lubrication of the part, this should also not be forgotten.

A few more subtleties of operation of the UAZ 469
Of course, even, probably, the manufacturer himself cannot know all the subtleties of the car, so we will try to tell you everything to the maximum. So, a few more subtleties:
- Reverse in the gearbox and downshift in the transfer case must be engaged only after the vehicle has come to a complete stop.
- Always disengage the clutch on steep slopes to avoid breaking the clutch disc.
- Never exceed the speed limit (more than 60 km/h) with the front axle on, and while driving on dry and hard roads, it can be turned off altogether.
- Also, in no case do not allow the inclusion of the front axle with the front wheels off.
- It is necessary to independently periodically check the external threaded fasteners and tightening during the operation of the vehicle.
- Be attentive to the chassis of the car and avoid shock loads on it.
- When driving on particularly dusty roads, to create air pressure in the cabin and reduce dust penetration, open the hatch in the middle part of the front end and close the swing doors.
Causes of breakdowns
As a rule, the need to replace the main components at the gearbox arises with their natural wear and tear.
 Causes of gearbox breakdowns
The main reason for oil leakage from the gearbox is the presence of an increased level of fuel in the system. For a checkpoint on a UAZ, use quality oil. If the liquid does not have the proper quality, then characteristic noises from the side of the box may occur due to this. When the synchronizer or its parts are worn, it is always difficult to change gears
Pay attention to the details of the switching mechanism. When the gear teeth are deformed, self-disengagement of gears is often noted.
Finally
Many of us remember the legendary car.
Therefore, his appearance at the show dedicated to the Olympic Games was perceived as part of our glorious history of the development of the domestic auto industry.
Loaf was awarded participation in the 2014 Olympics

Rice. 246. Scheme of electrical equipment of cars UAZ-3962 and UAZ-2206:
1-front lamp; 2-headlight; 3-turning headlight; 4-lantern special sign; 5-repeater of direction indicators; 6 washer motor; 7-wiper motor; 8-wiper and washer switch; 9-beep; 10-cabin ceiling switch; 11-cabin cover; 12-switch of a sound signal; 13-speedometer; 14-signal high beam headlights; 15 voltmeter; 16-oil pressure gauge; 17-signal lamp of emergency oil pressure; 18-coolant temperature gauge in the cylinder block; 19-signal lamp emergency overheating coolant in the radiator; 20-pointer of fuel level in the tank; 21-thermal fuse; 22-foot light switch; 23-alarm switch; 24-pin socket; 25-block of fuses; 26-signal lamp for turning on the parking brake; 27-signal lamp of an emergency condition of a hydraulic drive of brakes; 28-signal lamp of direction indicators; 29-switch of direction indicators; 30-interrupter of direction indicators; 31-ignition switch; 32-switch of the signal lamp for turning on the parking brake; 33-switch of the signal lamp of the emergency condition of the hydraulic drive of the brakes; 34-sensor signal lamp emergency overheating of the coolant in the radiator; 35-sensor signal lamp emergency oil pressure; 36-sensor oil pressure indicator; 37-sensor of the coolant temperature indicator in the cylinder block; 38-central light switch; 39 generator; 40 voltage regulator; 41-light switch reversing; 42-switch of the fan motor in the cab; 43-switch of the electric motor of the heater fan in the cab; 44-switch of the electric motor of the heater fan in the cabin; 45-brake signal switch; 46 spark plug; 47-sensor-distributor; 48 additional resistance; 49-ignition coil; 50 starter; 51-additional starter relay; 52-battery; 53-switch "mass"; 54-fan motor in the cab; 55-heater fan electric motor in the cab; 56-heater fan motor in the cabin; 57-plafonds in the cabin; 58-sensor fuel gauge in the tank; 59-cigarette lighter; 60-emergency vibrator; 61 transistor switch; 62-electronic carburetor control unit; 63-solenoid valve; 64-microswitch; 65-fog light switch with built-in turn-on signal lamp; 66-switches of ceiling lamps in the cabin; 67-rear light; 68 - license plate light; 69-reversing lamp; 70-pin trailer socket; 71-fog lamp; 72-valve unbalance float chamber carburetor
a-generator connection diagram with built-in integrated voltage regulator
Wire color code: B-white; G-blue; Y-yellow; 3-green; K-red; Kch-brown; O-orange; R-pink; C-gray; f-violet; H-black
1. Pos. 42 and 54 are installed on tropical vehicles. 2. Pos. 62, 63, 64 with a K126-GU carburetor are not installed. 3. Pos. 3, 4, 70 are installed only on the UAZ-3962 car
To ensure the operability of all electrical devices on any car, an electrical circuit is used. In this article, we will talk about legendary cars domestic production - UAZ. What is the electrical circuit of the UAZ Loaf car, what are its features - read about it below.

Lifting options for UAZ Loafs
The owners of the Loaf, starting tuning this car, first of all ask themselves the question: “How to raise the UAZ loaf?”. We will try to answer this question in this article. So, first of all, consider the methods of the UAZ elevator. It could be:
- Body lift UAZ
- Loaf Suspension Lift
Both options have both advantages and disadvantages. So, the Loaf body lift is easier to implement, and also stands out with a greater degree of safety. This is explained by the fact that this method of lifting only slightly shifts the center of gravity of the car, which helps to ensure the stable behavior of the Loaf on turns and other difficult sections of the route.
If we talk about the suspension lift, then there is some danger due to the increase in the center of gravity. But at the same time, this method significantly changes the patency indicators for the better.
Choosing a kit for the UAZ loaf elevator
As we can see, there are several ways to raise the Loaf. Therefore, to determine which lift kit UAZ Loaf will be needed, you can only decide on the choice of the lift method. If you are planning to lift yourself, you can buy a lift kit from the store. Such kits are different in the composition of the parts and elements included in them.
So, a Loaf lift kit may contain:
- spacers "spring - frame";
- spacers "spring - frame"
- bolts;
- nuts, etc.

wheel change
As you know, the patency of the car directly depends on the wheels. Considering that UAZ wheels are shod in rather hard and not too large sizes rubber, before proceeding directly to the elevator, it is necessary to mention the wheels. In addition, the tread pattern on Loaf tires leaves much to be desired. All this suggests that it would not be superfluous to install suitable imported wheels on the legendary car.
As an option, when choosing new wheels for the UAZ "Loaf" car, you can use BF Goodrich 33x10.5 R15 tires, and, accordingly, disks with a diameter of 15 centimeters. As for the choice of disks for them, it depends on the desire of the owner. It can be lightweight or alloy wheels. And you can leave the usual regular disks.

However, you should not stop at this stage, because such tuning makes it difficult to manage, because on sharp turns the front wheels cling to the edges of the steering rods, and when the effect of crossing bridges appears, the wheels are located directly on the sides of the arches. This causes the tires to rub against the fender. Therefore, an indispensable stage of tuning after installing the wheels is the UAZ Loaf body lift.
Strange as it may seem, the frame of the UAZ Loaf is attached to the body with ten furniture bolts, six of which are located in the passenger area, two behind the front wheel arches, and two more at the feet of the driver and passenger. From below, the bolts are secured with second nuts.
Before proceeding with the dismantling of the bolts, it is necessary to disconnect the battery, disconnect the mass from the engine - behind the hood compartment and raise the car on a lift.
- Disconnect the wires from the starter;
- Disconnect the radiator mounts from below or from above;
- We unfasten the drive rods of the transmission lever and the brake booster rods;
- Drain all the coolant and remove the hoses that are connected to the UAZ Loaf stoves;
- Disconnect the brake pedal link to the vacuum booster;
- Disconnect the tube leading to the tank control valve.
The last point may not seem so important, but failure to comply with it can lead to deflection of the plate under the mount, as a result of which it will have to be leveled.
When lifting the UAZ Loaf with your own hands, be careful and careful, since the fasteners on such a car are usually rusty and outdated. If the bolt turns in the body, it cannot be held. This creates additional difficulties in welding a nut or bolt to it.
To do everything right, you need to hold one nut with a wrench, while unscrewing the lock nut with the head, and after that the main nut.
Next, you should lower the car on the wheels, since no more work will be required under it. Also disconnect steering column and unfasten the anther on the floor. And you can start lifting the body over the frame. The ascent must begin from the back of the Loaf. The height of the lift should eventually be about 10 centimeters.
It would be nice to insure by placing a wide wooden beam between the frame and the body.
We unscrew the standard bolts and increase the holes for them up to 12 mm by drilling. Next, you need to do some work with spacers. An inexpensive and suitable option as spacers are ordinary hockey pucks. The next steps will be to insert the spacers, bolts and tighten the nuts gradually, starting from the rear of the body, continuing in the middle and ending at the front.
As a result, the body will rise by 6.5 centimeters. It remains only to fix everything and you can put big wheels.

Pros and cons of a suspension lift
Now consider the next way to carry out the UAZ Loaf lift - suspension lift. As already mentioned, this method has both pros and cons. There are two main advantages of the suspension lift on the UAZ:
- improvement in the patency of the Loaf, ensured by the fact that the wheels remain in place, and the other part rises;
- the ability to install large wheels that, before the suspension lift, did not fit in the UAZ arches.
Well, the main disadvantage of this method is the inevitable increase in the angles of the cardan crosses. In this case, the cardans are included in the work for wear.
There are several options for a suspension lift. Let's consider some of them.
Installing longer shackles
The most simple and affordable option is the installation of longer spring shackles. When carrying out a suspension lift in a similar way, you should not get carried away with it so as not to install too long. Too long leaf springs can adversely affect suspension performance and affect handling. To avoid problems in handling, it is recommended to tighten the earrings with a tie in the center.

Bridge-spring spacer
Without violating the design of the springs, it is possible to slightly raise the suspension of the Loaf by installing a spacer between the bridge and the spring. At the same time, you don’t have to wait for a large elevator, it is also recommended not to get involved in the process here.
Of course, when installing such a spacer, it is necessary to decide on its fixation in the installation place, and also to calculate that the length of the spring ladders is sufficient. It is also possible to restore old springs, or purchase new ones. There are also special items for sale for such tuning, but they are usually very expensive.

Springing springs is not as difficult as it might seem at first glance. This process is useful not only for the sake of a suspension lift, but also in order to make the stiff UAZ suspension soft enough. However, despite the fact that there is an improvement in the quality of the suspension from this method, they are very insignificant.
If you decide to give it a try, you'll first need to cut, grind, or buy spacers, rubber, conveyor belt, and metal. And most importantly, with the UAZ suspension lift, longer-stroke shock absorbers will be required, since the rebound for the former ones will begin earlier.

In conclusion, I would like to note that the main thing is to know the measure in everything. When you take up tuning the UAZ 452 with your own hands, remember your safety as well. After all, you will not have a guarantee with your own performance of the Loaf lift.
The car UAZ-3741 ("Loaf" or "Pill") is not picky about pavement- he will pass where he needs to, and not where he can. In many ways, this is the merit of the front drive axle, which always comes to the rescue - read about this node, its types, device and operating rules in this article.
Chassis and transmission device UAZ-3741
Already the first car of the Ulyanovsk Automobile Plant - the famous GAZ-69 - had a 4 × 4 wheel formula, had simply fantastic cross-country ability and was extremely unpretentious. And to this day, the concept of the "people's SUV", incorporated in the legendary "Kozlik", remains relevant and is implemented in all modern UAZ models. Four-wheel drive is also provided in the UAZ-3741 car (until 1985 - UAZ-452), which is better known under the name "Loaf" (which reflects its characteristic shape) or "Pill" (due to frequent use as ambulances) and ambulances in the army).
The basis of the chassis of the UAZ-3741 is two drive axles with a classic dependent suspension on semi-elliptical springs and hydraulic shock absorbers. Moreover, only in this model, the springs have 13 sheets each (in other models there are fewer sheets), and on the front and rear suspension springs are interchangeable.
The transmission of the car has a fairly simple device, it is also built according to the traditional scheme without any features. The transmission contains a 4-speed manual gearbox (classic manual transmission), which is paired with a two-stage transfer case (has upshift and downshifts) - thanks to the presence of a “transfer case”, the number possible transfers doubles, which greatly increases the transmission capabilities. torque from transfer box with the help of two cardan shafts transmitted to the front and rear drive axles. In the drive axles, the moment is divided into two streams and sent to the wheels, ensuring their rotation.
Separately, let's talk about the purpose and arrangement of the front drive axle of cars of the UAZ-3741 family.
Detail: repair running uaz do-it-yourself loaf from a real master for a site site.
Any motorist can repair the front axle of the UAZ Loaf and UAZ 469 with their own hands. This work is easy. Structurally, both of these models are similar. This is especially true for the suspension. frame construction implies ease of dismantling the front axle and high vehicle reliability. There are some differences in the spring and spring suspension. But these features do not greatly affect the complexity of the work.Almost no special tools are needed for repairs. All work is carried out with a minimum set of tools available to each driver.
Do-it-yourself front axle repair UAZ Loaf and UAZ 469 uncomplicated. Most often, during operation, it is necessary to carry out various preventive work. As a rule, they do not require removal and disassembly of the bridge. The care list includes:
- The pivots are checked for gaps;
- Threaded connections must be periodically tightened;
- Convergence is checked;
- The requirements of the parts lubrication tables are followed.
Be sure to visually inspect the main nodes. Particular attention is paid to the serviceability of the fixing bolts. Also, all locking elements must be securely fastened. Check Angle maximum turn wheels. It should not exceed 28 degrees. If the values differ from those indicated, adjustments must be made. Also, always check that the king pins are properly tightened and functioning properly. Untimely elimination of minor faults may lead to the need for a major overhaul of the front axle.
Repair of this node begins with the dismantling of the bridge. On a loaf and a goat, these works are performed identically. There are only small differences. When performing repairs, you need to be extremely careful. Removing the bridge is a series of simple steps:
- You should start by ensuring the immobility of the car. For this, anti-recoil brake pads are installed;
- Further on the "goat" turn off brake pipes from hoses. On the Loaf, the tubes have transition pipes. In this case, the hoses are disconnected from the nozzles;
- Remove the nuts securing the lower shock absorber cups. This item is the same on both machines.
- Next, unscrew the bolts connecting the drive gear flange and the front cardan. Before this, you need to fill in the WD-40 threaded connection;
- Remove traction from the bipod. The nut located on the ball pin is twisted;
- Twist the nuts that secure the spring ladders. Disassemble them with overlays;
- They will jack up the frame in front of the car, roll out the bridge.
Some UAZ 469 cars are equipped with springs. In this case, the penultimate paragraph will look a little different. The penultimate action removes the stabilizer roll stability, by disconnecting from the suspension arms located along the longitudinal. The levers and cross rod are unscrewed from the bracket.
Repair. After disassembly, all parts are washed in gasoline and lubricated. Faulty ones are replaced with new ones. The assembly takes place exactly the opposite, while it is necessary to clarify some of the nuances of the process.
When replacing the pivot bushings specifically in the ball joint, it is necessary to tighten them up to 25 mm at the end of the pressing. Lubricant needs to be put in. Do-it-yourself repair of the front axle of the UAZ Loaf and UAZ 469 is not so difficult, but accuracy is needed. For example, when installing a ball seal, the ring for it must be impregnated with hot oil. After assembly, the operability of the bridge is checked using a stand.
UAZ 452 "loaf" - a fairly reliable Soviet all-wheel drive SUV. The main breakdowns of this car are associated with leakage of lubricating fluids from the engine, gearbox (gearbox), front and rear axles, constant velocity joints (CV joints) and hubs. The main reason for the formation of such leaks is that the material from which the original oil seals and gaskets of the above units are made is partially corroded under the influence of modern lubricating fluids. Due to poor lubrication, moving metal parts wear out and have to be replaced periodically. It is necessary to carry out preventive maintenance of the UAZ 452 at least once a year, change leaking seals and gaskets, and adjust the clutch.
The problem is that finding a factory repair manual for these SUVs is quite difficult. Therefore, we bring to your attention an instruction that will allow you to repair a car yourself.
As you know, the repair of a car engine begins with its dismantling. And only then disassembly, replacement of damaged parts and assembly is carried out. Overhaul of the power unit is not an easy task, therefore it is not worth doing it yourself, without the help of experienced craftsmen. But you can change the seals yourself.
The factory repair manual for the UAZ 452 car indicates: to remove power unit, gotta lift it up out engine compartment. With this method of dismantling, you will need 2 strong pipes (longer than the width of the cab) and the help of 2 people.
Everything, the power unit is removed.
Check if you need overhaul engine, easy: you need to put your hand on the open oil filler neck of a running engine. If the palm pushes out, then disassembly is required.
Quite often, in UAZ 452 cars, the free play of the clutch pedal is not adjusted. This leads to increased wear of the driven disk and the need for early replacement. Adjusting the clutch of a UAZ 452 car is quite simple.
Clutch design.
- Clutch release pedal.
- Brake pedal.
- Springs.
- Butter dish.
- Thrust bearing.
- Coupling.
- Clutch spring.
- Lever arm.
- Adjusting bolt.
- Fork.
- Pusher.
- Fork spring.
- Traction.
- Press grease fitting.
Clutch pedal adjustment
The factory manual for the repair of wagon-mounted UAZ vehicles sets the following unit parameters:
- the gap between the pressure bearing and the heads of the screws of the levers is 2.5 mm;
- pedal free play - 28-35 mm;
- full pedal travel - 145-155 mm.
Clutch adjustment is carried out as follows.
- We measure the free and full travel of the clutch pedal with a ruler.
- Remove the pedal springs and clutch forks.
- Loosen pusher nut.
- We unscrew or twist the thrust tip of the pusher until the recommended parameters are reached.
- Tighten the pusher nut.
- We put the springs back.
After that, we check the consolidated and full pedal travel. If they correspond to the recommended parameters, we start the engine and check the operation of the clutch while driving. If it does not drive or slip, the clutch adjustment is complete. If something bothers, repeat the procedure until the desired result is obtained.
Widely used not only in the territory Russian Federation but also abroad. The device of the front axle UAZ loaf allows you to connect four-wheel drive to overcome off-road. Thanks to this, the machine is distinguished by high cross-country ability in difficult areas of rough terrain.
How the UAZ front axle works
The scheme of the front axle UAZ loaf allows you to determine that it consists of several nodes:
- Composite crankcase;
- Reducer;
- Half shafts.
Below is the arrangement of the components of the front axle of a UAZ loaf car.
Carter
The crankcase of the bridge of the UAZ car loaf consists of 2 parts. Between themselves, the parts are bolted, while forming the gearbox housing. Parts of the crankcase are equipped with mounts for installing springs and shock absorbers.
IMPORTANT: When using the vehicle, the grease in the crankcase heats up and expands. In this case, the pressure in the crankcase cavity increases. To prevent leakage of the crankcase of the bridge, a breather valve is provided. It is installed on the housing of the semi-axis of the UAZ front axle and is necessary for communicating the crankcase cavity with the atmosphere.
Rotary mechanisms are located along the edges of the bridge. They are essential for driving. The mechanisms are pivotally connected to the edges of the crankcase. Pins are installed on the rotary mechanisms. They are necessary for articulated connection with the hubs of the car. To reduce the degree of friction, the hub is mounted on roller bearings.
Reducer
The front axle reducer UAZ loaf consists of the main gear and the cross-axle differential. When the front axle of the UAZ loaf is turned on, the torque from the gearbox is supplied through the cardan shaft to the gearbox flange. It is mounted on the same shaft as the final drive gear.
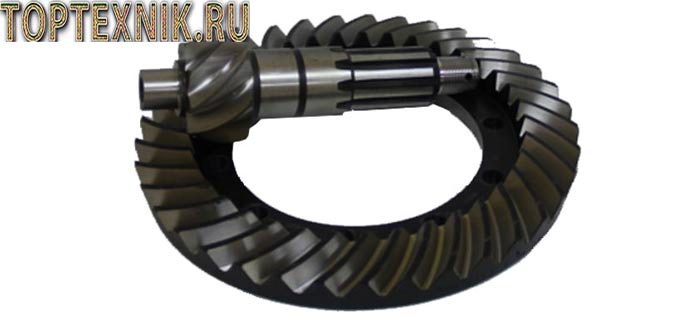
As the drive gear rotates, it transmits torque to the driven gear. Compared to the drive gear, it has a large diameter. This allows you to reduce the torque transmitted from the transfer case.
REFERENCE: The gear teeth of the main gear of the UAZ car reducer are located at an angle. This prevents the gear teeth from beating against each other, thereby reducing the noise level when the vehicle is moving.
An interwheel differential is located inside the driven gear. It consists of conical satellites and their axes. The differential mechanism includes the splines of the semi-axes. The differential allows you to achieve a difference in the speed of rotation of the wheels of one axle when turning the car. You can also read about.
half shafts
Front axle car UAZ loaf is a shaft with slots on the edges. On the one hand, splines are installed in the differential of the gearbox. The other side of the axle shaft drives the wheel hub. The transmission of torque from the front axle gearbox to the wheel mechanism is carried out using a CV joint. It allows you to transmit torque regardless of the angle of rotation of the wheel mechanisms.
A distinctive feature of the front axle of the UAZ loaf car is the ability to disconnect the wheel hubs from the axle shafts. This is necessary to prevent wear of the rotating parts of the gearbox during long-term movement on the surface. good quality.
Possible bridge malfunctions and their causes
The front axle of the UAZ loaf car is distinguished by reliability and unpretentiousness to operating conditions. Most frequent malfunctions this:
- Violation of the sealing of the crankcase. The excess pressure that occurs when the oil is heated when the car is moving leads to a violation of the sealing of the crankcase. To prevent malfunction, it is necessary to regularly check the performance of the breathing valve;
- Bearings worn out. Occurs as a result of improper operation of the front axle of the UAZ loaf car. Switching the UAZ loaf front axle to the on position when driving on a good quality surface leads to rapid wear of the gearbox bearings. To prevent damage to the bearings, it is necessary to connect the front axle only to overcome off-road;
- Increased wear on rotating parts. Occurs due to poor quality lubricant. It is necessary to change the oil in the front axle regularly. The cause of the malfunction may be water entering the gearbox housing when overcoming the ford. To prevent water from entering the gearbox crankcase, the breathing valve is equipped with a hose attached under the engine compartment cover.

- Violation of the cross-axle differential. Often occurs due to wear of the pivots. To prevent breakage, it is necessary to regularly inspect the mechanism of the pivots for the presence of play. If the permissible values are exceeded, the pivots should be replaced;
- Breakage of the main gear shaft bearing. Occurs due to a malfunction of the cross cardan shaft. The integrity of the cross should be checked regularly.
- High degree of wear of conical satellites or their axes. The integrity of the conical satellites and their axles is affected by the pressure difference in the tires of the front axle wheels. Tire pressure must be constantly monitored to avoid breakdowns.
Wiring diagram of the front axle UAZ loaf
Some car owners are wondering how the front axle on the UAZ loaf is turned on? The front axle is engaged in two ways:
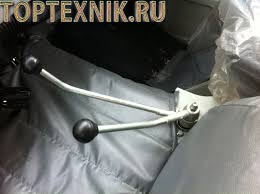
- Lever mounted in the cab. The lever controls the transfer case. When the front axle of the UAZ loaf is turned on, using a lever installed in the passenger compartment, the torque from the transfer case is transmitted along the driveshaft to the drive axle.
- With the help of couplings installed in the wheel mechanisms. It is possible to detach the drive axle hub from the axle shaft. Turning the UAZ loaf front axle on and off with the help of clutches allows you to reduce the load on the gearbox when driving on a hard surface.
IMPORTANT: after disconnecting the couplings located in the wheel mechanisms, connecting the all-wheel drive with a lever from the passenger compartment will be impossible.
To engage the clutch it is necessary to remove the protective cover of the drive axle hub. Using a hexagon, tighten the coupling cap until it stops. The axle shaft splines will engage and the hub will be connected to the gearbox. To disengage the clutch, reverse the procedure.
To connect the all-wheel drive with a lever installed in the passenger compartment, it is necessary as follows:
- Disengage the clutch;
- Set the gearshift lever to neutral position;
- Move the control lever to the extreme forward position;
- After completing the steps, the four-wheel drive will be turned on. It is necessary to turn off the four-wheel drive by moving the lever to the rearmost position.
ATTENTION: Before you disable or enable the front axle on the UAZ loaf, you must turn off the clutch. To do this, depress the clutch pedal located in the passenger compartment.
Removal and repair of the front axle
The front axle UAZ loaf has a simple device, which allows you to do the repair yourself with minimal technical knowledge. To remove the assembly from the car, you must:
- Car to a viewing hole, overpass or lift;
- Immobilize the machine to prevent spontaneous rolling. For this under rear wheels install recoil devices (shoes);
- Jack up the car frame. To simultaneously raise both sides, the jack is installed in the front of the frame in the center;
- To avoid injury, install the car frame on specialized supports;
- Unscrew the nuts securing the axle to the semi-elliptical springs;
- Dismantle the steering arm;
- Unscrew the shock absorber mounting nuts;
- Dismantle shock absorbers;
- Remove the vehicle's drive axle.

REFERENCE: If it is necessary to replace the elastic cushions installed in the spring mounting brackets, the axle is dismantled together with the springs. To do this, instead of the nuts of the ladders, the bolts fixing the covers of the brackets are unscrewed.
A person who has certain skills in repairing equipment can repair and adjust the front axle of a UAZ loaf car. To diagnose a malfunction, it is necessary to conduct a visual inspection of the assembly. FROM outer side the UAZ crankcase is inspected for oil leaks. The presence of oil streaks indicates crankcase depressurization. To eliminate oil leakage, it is necessary to replace gaskets and seals. During installation, the gaskets are lubricated with sealant.
After disassembling the assembly, it is necessary to pay attention to the integrity of the bearings. Damaged parts must be replaced with new ones. Particular attention is paid to the wear of rotating parts. If the permissible norm is exceeded, worn parts should be replaced.
ATTENTION: The drive and driven gears of the final drive of the reducer are replaced at the same time. Replacing one of the final drive gears can lead to its rapid wear due to damaged teeth of the second gear.
From the above, it follows that the UAZ front axle, due to its design, improves specifications car. The front axle is equipped with swivel mechanisms. This allows you to transfer torque from the gearbox to the wheels of the vehicle, regardless of their angle of rotation. It is possible to disconnect the gearbox and wheel mechanisms by disengaging the clutches.