LEDs in headlights have a strong luminous flux and a long service life. They allow you to significantly save on energy, and their service life can reach 7-10 years.
Leading car brands cannot stay away from innovation. Moreover, they are intensively implementing them. LEDs in the headlights were no exception. The first company to use them in production cars was Audi. The slightly bluish tint of the light gave the new series of cars a futuristic look, making them a bestseller.
At first, LED headlights were installed only in expensive premium cars. But times are changing and now you can find this type of lighting even in budget cars. However, for the sake of fairness, it is worth noting that in most cases this function is optional and you will have to pay extra for it.
If you have an old Lada or Ford from the nineties, then you will have to do the installation of LEDs in the headlights yourself. Fortunately, the installation process is not particularly difficult. In addition, the necessary set of tools for this can be found in every garage.
What is a car head light?
Before you start installing LEDs in headlights, you need to understand the very concept of headlights. In fact, this is a whole complex, which includes:
- daylight lights,
- near and far beam,
- all weather lights.
Some drivers decide to replace only one set of headlights with LEDs, while others completely change their headlights in the hope of achieving greater safety, economy and reliability.
It is on the point of expediency when installing LEDs in headlights that we need to dwell in more detail. So, this technology allows you to significantly save on electricity. This automatically increases the battery life and reduces gasoline consumption. Of course, the difference will not be very noticeable, but if you count in thousands of kilometers, the savings will be impressive.
First of all, drivers install LEDs in daytime headlights. The fact is that these headlights almost always work and no one has the desire to constantly change light bulbs, throwing thousands of rubles on it. In addition, reliable European lamps with a service life of one year are very expensive.
Installing LEDs in low and high beam headlights also makes sense. If possible, it is recommended to carry out a complete modernization by installing LEDs in the entire headlight complex.
Pros and cons of LEDs

Each technology has its pros and cons. LEDs were no exception; the obvious advantages of the equipment include:
- The light emitted by LEDs is as close to natural as possible.
- The LED lamps activate instantly and immediately operate at full power.
- The lamps do not contain harmful substances such as mercury and other chemical compounds that are harmful to the environment.
- If we take into account the service life of LEDs for headlights, their purchase is extremely profitable.
- Improved road safety due to better lighting.
- LEDs are absolutely insensitive to vibrations due to the absence of a filament.
- LEDs for headlights are resistant to high and low temperatures and also have low power consumption.
At first glance, the advantages of LEDs in headlights are more than significant, but there are also disadvantages. First, the light elements need fine tuning and calibration. Otherwise, the risk of an accident greatly increases. Secondly, if you use non-original LEDs during installation, you will need separate insurance for them.
With the right approach, the disadvantages of LEDs in headlights can be completely eliminated. It is enough to buy original spare parts and spend a little time on fine tuning.
Another important advantage of LEDs in headlights is their wide range of uses and aesthetic appearance. You can choose any color of the elements, thereby making your car unique. The top illumination is considered to be blue and green light.
How LED headlights work

The design of LED headlights is fundamentally different from halogen ones. Many small details provide modern technology with tactical and strategic advantages over outdated analogues.
If you choose three main differences in the design of LED headlights from halogen ones, then they are the presence of a lens, a cooling system and a reflector. The fact is that the LED, in addition to bright light with a characteristic bluish tint (standard modification), emits a large amount of heat.
Considering that on long trips, headlights with LEDs have to work for 10-12 hours without a break, a good cooling system is simply necessary. At first, car manufacturers tried to install radiators, but such a solution was extremely unprofitable.
To ensure good cooling using a radiator, you need a lot of free space, which simply isn’t there. Let's do a simple calculation. The LED emits about 20 watts. Such power creates a light flux of 1500 Lumens. For effective cooling, a minimum of one and a half hundred square centimeters of area is required. An impressive figure, isn't it?
Important! A solution was found in the form of fairly powerful coolers that provide the required thermal conditions.
Separately, we need to talk about the features of light direction with LEDs in headlights. The uniqueness of the LED lamp is that the rays are directed in different directions. The main task of the lens is to focus them into one stream and direct them in the right direction.
For the sake of comparison, let's look at the operating principle of a halogen lamp. The design has two reflectors. One directs light to the other, and the latter, having bounced back, illuminates distant and nearby objects.
LEDs in low beam headlights
The feasibility of installing LEDs in low beam headlights depends on the correct selection of equipment. It must provide the required light flow and fit perfectly into the main structure.
In addition, everything needs to be arranged correctly. First, you need to take care of replacing the reflector and lens. Secondly, make fine adjustments. Thirdly, you should not skimp on power. LEDs in low beam headlights require lamps with a power of at least 20 W.
Attention! For navigation lights, LED equipment rated at 3-12 W is sufficient.
Installation
Many new cars are sold with LED headlights, and drivers are increasingly thinking about purchasing the same devices for themselves. This is not surprising, because the list of advantages of the equipment is more than impressive. But for the installation to be successful, you need to strictly follow the instructions and follow safety rules.
What you need to install LEDs in headlights

There are many methods for installing LEDs in headlights. It is not surprising that the list of necessary tools is constantly changing. But if you choose the simplest and most effective algorithm, then you will need:
- soldering iron,
- sealant,
- wire,
- drill,
- dye,
- insulating tape,
- marker.
You also need to stock up on the car's wiring diagram. This will not only allow you to quickly find the desired contact, but will also prevent the very possibility of an accident from an electric shock.
General installation algorithm

To ensure that the installation of LEDs in the headlights goes without any difficulties, it is best to carry it out in a garage in good lighting. The process itself consists of the following stages:
- At the first stage, carefully remove the headlights and place them on the table.
- Warm up the fastening layer with a hairdryer and dismantle it.
- Light reflectors must be painted black. This will protect oncoming drivers from glare. Otherwise, your headlights may cause an accident.
- Take a marker and mark the locations for installing the diodes.
- Use a drill to drill neat holes.
- Connect the diodes with resistors. This will help avoid short circuits and protect the wiring from possible burnout.
- Connect the equipment and install everything back. Secure the part with wire, which should be in your inventory.
- Before filling the headlight with LEDs with sealant, check the functionality of the entire system. If something doesn't work, reconnect.
After the LEDs are installed in the headlights, do a few more test checks and only then drive out onto the road.
Installing daytime running lights
Remove the front grille of the car and cut some holes for the lamps. Smooth out the radiator fins. You can use simple glue as a fixative. LED headlights weigh almost nothing, so glue will be more than enough.
Use the wires in the bumper as a power source. After installation is complete, take care of the cables. According to safety regulations, they must be securely fastened. The ideal option is to connect the power supply directly from the battery.
Important! A relay is responsible for the automatic operation of the LEDs in the headlights of the daytime running lights.
Results
Every year, more and more drivers install LEDs in their headlights. This allows you to save on gasoline and also provides increased safety on the road. The most important advantage of the equipment is its durability. One diode can last about 10 years. Installation is not a particularly complicated process and can be done by every car owner.
When I decided to renovate the hallway, one of the first questions that arose was the question of choosing the type of ceiling finish and which ceiling lights to install. Having many years of experience in using PVC stretch ceilings in the bathroom and living room, it didn’t take long to choose the type of ceiling. I decided to install a PVC suspended ceiling due to its many advantages compared to other types of ceiling finishing.
The ceiling lights took some thought. On the one hand, I wanted to install modern LED spotlights, and on the other hand, in the hallway there was a homemade set of chandeliers and sconces, made with my own hands. I liked them, and I didn’t want to part with either the chandelier or the sconce.
Ultimately, a compromise solution was found: the chandelier and sconce at the entrance to the hallway should be left hanging in their original places, and in the hallway corridor, where a single-lamp lamp hung on the wall, spotlights built into the suspended ceiling should be installed.
Before installing a suspended ceiling, it is necessary to lay electrical wiring, and in order to lay the wires, it is necessary to develop an electrical circuit based on the type and number of lamps, the type of light bulbs and their power.
Selecting the type of light bulb for a recessed ceiling light
Before purchasing a lamp built into a suspended ceiling, you need to select the type of light bulbs and determine the required number of them to ensure sufficient illumination of the room. Currently, four types of lamps are used for installation in recessed ceiling lamps: incandescent, halogen, compact (they are also called energy-saving or fluorescent lamps) and LED. Each type of light bulb has its own advantages and disadvantages; in addition, it affects the minimum distance between the installation horizon of a suspended ceiling and a fixed one, which is a determining factor in rooms with low ceilings.
Using the table below, you can easily make the optimal choice of the type of light bulbs for a suspended ceiling, based on your requirements and boundary conditions.
| Table for selecting the type of light bulbs for recessed ceiling luminaires | ||||
|---|---|---|---|---|
| Technical specifications | Lamp type | |||
| Incandescent | Halogen | Energy saving | LED | |
| Minimum distance between main and suspended ceilings*, cm | 10-12 | 5-6 | 10-12 | 5-6 |
| Supply voltage, V | 220 | 12, 220 | 220 | 12, 220 |
| Luminous flux*, Lm/W | 10-15 | 15-20 | 50-70 | 80-120 |
| Maximum power*, W | 40 | 40 | 40 | 7 |
| Color temperature, °K | 2700 | 3000 | 2700, 3300, 4200, 5100, 6400 | 2700, 3300, 4200, 5100 |
| Service life*, hour | 1000 | 4000 | 8000 | 70000 |
| Price | Very low | Low | Average | High |
Technical parameters marked * may differ up or down depending on the design of the lamp and light bulb, the power of the light bulb, the manufacturer, and the type of suspended ceiling. For example, PVC stretch ceilings are afraid of heating above 60°C, and this limits the permissible power of light bulbs in recessed luminaires.
It should be noted that halogen lamps, designed for a supply voltage of 12 V and 220 V, are very sensitive to excess supply voltage and often burn out as a result. For 12 V halogen lamps, a step-down transformer or power supply (adapter) is required, for which you must remember, in case of installing a suspended ceiling without access to the interceiling space, to provide a special place on the wall.
You can obtain more detailed information about incandescent and halogen lamps, energy-saving lamps, and LED lamps by visiting the website pages specifically dedicated to them.
Calculation of power and number of lamps
The power of the lamps depends on the size of the room (area, height and shape), the color of the walls and furniture, the purpose of the room and the preferences of the owner. Some people like bright light, while others prefer warm, diffused light of low brightness.
It is almost impossible to accurately calculate the power and number of luminaires, taking into account all factors. For an estimated calculation, you can use the illumination data presented in the table, thanks to which, taking into account the luminous flux depending on the type of light bulb, you can determine how many and what power lamps need to be installed in the room, depending on its type.
| Table for calculating the power and number of lamps depending on the type of room | ||||
|---|---|---|---|---|
| Type of room | Power required to illuminate 1m2 of room area depending on the type of lamp |
|||
| Incandescent | Halogen | Energy saving | LED | |
| Children's | 40 | 30 | 10 | 5 |
| Kitchen | 30 | 25 | 7 | 4 |
| Living room, bathroom, toilet | 25 | 20 | 6 | 3 |
| Bedroom, hallway, corridor | 20 | 15 | 5 | 2 |
| Utility rooms | 10 | 7 | 2 | 1 |
Let's look at an example of a calculation that I did for the hallway corridor. It was planned to install LED ceiling spotlights. The shape of the corridor is the letter T with areas of 2.8 m2 and 4.5 m2. The total area of the corridor was 7.3 m2. Let's calculate the required power of the lamps 7.3 × 2 = 15.6 W. Since the ceiling height was 2.75 m and the walls were planned to be painted in creme brulee color, taking into account the complex shape of the corridor, the optimal solution would be to install four ceiling spotlights with LED lamps installed in them with a small reserve, with a power of 5.5 W, supply voltage 220 V with pin socket GU5.3. The pin plinth for suspended ceilings is good because it has small dimensions, which is important when the inter-ceiling space is small in height.

Before the renovation, there were paintings by artists on the walls in the corridor, which were planned to be left in their original places after the renovation was completed. Therefore, for undistorted color rendition, white light LED lamps with a color temperature of 4000 K were chosen. If you need warm light, then you should choose a lamp with a color temperature of 2700 K.
It should be noted that it is not always advisable to use recessed ceiling lamps in rooms as the only source of lighting. A much better result can be obtained by using additional wall lamps or table lamps in the work or relaxation area. In this case, the power of the lamps in the ceiling lamps can be reduced.
If you have local lighting lamps, it is quite possible to completely abandon the lamps built into the suspended ceiling, replacing them with LED strip ceiling lighting. So, when solving the issue of lighting the premises of an apartment, there is room for creative imagination to unfold.
Selecting a wire for wiring spotlights
To lay the power supply wiring for four selected lamps with a total power of 22 W, any double-insulated electrical wire designed for wiring is suitable. A copper stranded double connecting wire, for example type PVA 2×0.75, is best suited. You don’t have to think about the cross-section of the wire cores, since the maximum current will not exceed 0.1 A.
When using 12 V halogen lamps in ceiling lamps, the wire cross-section must be calculated. One such 60 W light bulb consumes a current of 5 A. And if ten light bulbs are needed for lighting, then the current consumption will be 50 A.
Selection and installation of a recessed ceiling spotlight
The range of recessed ceiling lamps in any lighting store is huge, but they are all designed the same and differ only in the type of body finishing and additional decorations. Some models of recessed luminaires provide the ability to change the direction of the light flux within small limits.

Since I needed to illuminate the corridor, the choice fell on the simplest type of recessed lamp, which also included a base socket.

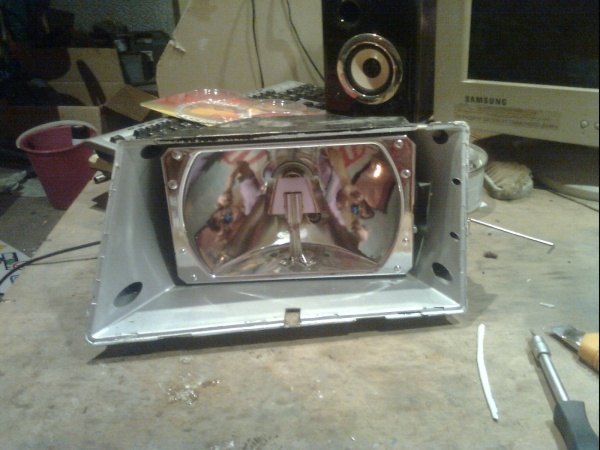
Any recessed ceiling lamp consists of a body, which is a shaped profile ring with areas for attaching two springs with ears. Depending on the type and power of the light bulbs, the lamp housings come in different diameters and may not have them, like the lamp in the photo above, or they may have an electric socket installed, usually E14.

A special place is occupied by LED ceiling spotlights, in which the LEDs are installed directly in the housing on a printed circuit board.

The light bulb in such a lamp cannot be replaced, and if it fails, you will have to replace the entire lamp or look for replacement LEDs. Such lamps are expensive.
For lamps without sockets, a spring in the form of a cut ring is used to secure the light bulb in the body.

The light bulb is inserted into the lamp body and is fixed due to the fact that the spring ring, unclenching, fits into a specially made groove in the body. This lamp is suitable for installing both halogen and LED bulbs. When replacing halogen bulbs with LED bulbs or vice versa, you must remember to check what supply voltage they are designed for.
To secure a ceiling spotlight in a suspended ceiling, regardless of its type, a hole is cut in a given location on the ceiling, slightly smaller than the outer diameter of the flange of the lamp body.

The ears of the springs are brought together by hand to such an extent that they pass into the hole in the ceiling. The ears are inserted into the ceiling hole and released. Leaning on the inner surface of the suspended ceiling, the lugs are pulled in until the flange stops against the lower surface of the suspended ceiling and thus fix the luminaire.
Such a simple design for mounting a ceiling lamp allows you to hide the elements of its fastening and easily remove the lamp if necessary. Simply grab the base of the lamp and pull it down.

After installing the lamp body on the suspended ceiling, a wire is threaded through it and connected to the socket using a terminal block. The socket is placed on the base of the light bulb, the light bulb is inserted into the lamp body and secured with an expansion spring.
Electrical wiring diagram
for spotlights
Before installing a suspended ceiling, after choosing the type of light bulbs, calculating their power, the number of lamps and their installation points, an electrical wiring diagram is developed. When developing an electrical circuit, it is necessary to take into account the points and methods of connecting the wires to each other and to the lamps.

Since wires were already coming out of the wall, to which the wall lamp had previously been connected, it was decided to connect the ceiling lamps to these wires. It was planned to install a suspended stretch ceiling made of PVC, and the wires came out above the level of the stretch ceiling, and, therefore, there would be no access to the connection points of the wires after installing the ceiling. Therefore, it was decided to make all wire connections in the most reliable way, twisting followed by soldering with tin-lead solder. The soldering points were marked on the electrical diagram.
When choosing a place to install lamps and chandeliers in rooms where there is a TV or computer, you must not forget that the angle of incidence of the light beam is equal to the angle of reflection. Taking into account this rule, lamps must be installed in places that exclude their reflection on the monitor screen, therefore, to select installation points for lamps, it is necessary to think about how the furniture will be arranged, in what place the TV or computer monitor will be installed.
When choosing light bulbs for a supply voltage of 220 V, installation of additional devices is not required. In the case of using light bulbs with a supply voltage of 12 V, it is necessary to provide a place for installing transformers or adapters, taking into account their overall dimensions and possible access to them for maintenance or repair.
Attention! Before connecting spotlights, to avoid electric shock, it is necessary to de-energize the electrical wiring. To do this, turn off the corresponding circuit breaker in the distribution panel and check the reliability of the shutdown using the phase indicator.
Electrical wiring installation
for connecting spotlights
After purchasing lamps, determining their installation locations, purchasing materials and equipment, you can begin installing electrical wiring.

Installation of electrical wiring for connecting lamps can be carried out at any stage of the renovation of the room, right up to the installation of suspended ceilings. But when repairing the walls in the corridor, it turned out that the light from the existing lamp was not enough. Therefore, the installation of electrical wiring had to be done first, and temporary sockets with energy-saving light bulbs were connected to the electrical wiring for lighting.

Before installing the wires, it is necessary to mark on the ceiling the installation locations of the lamps (circled in the photo) and the points where the wires are attached. To avoid sagging, the wires, depending on their rigidity, are fixed in increments of 40-50 cm.

To secure wires to the ceiling and walls, there are special dowel clamps (pictured on the left) and nail brackets (pictured on the right) of different sizes. To secure the wire with a dowel clamp on the wall, you need to drill a hole, put the dowel clamp on the wire and hammer the dowel into the hole. To secure a wire with a nail clip, you need to press the wire against the wall with it and hammer in the nail. Suitable for installation of wires and cables on wood, plastic, plaster.

Nail clips driven into a concrete plastered ceiling may fall out and remain on the PVC sheet. Therefore, this type of fastening was discarded. It turned out that I didn’t have dowel clamps at hand, so I used a simple and reliable method of securing the wires to the wall, using a clamp made from a vinyl chloride tube. A hole is drilled in the ceiling, a dowel is driven into it, and a self-tapping screw is screwed into the dowel through the hole made in the clamp. Since the weight of the wire is negligible, any self-tapping screw and dowel of the smallest standard size will do.
Making a wiring harness
ceiling spotlights
Since the electrical wiring for ceiling lamps after installing a stretch ceiling will be inaccessible for maintenance and repair, all wire connections in the inter-ceiling space must be made extremely reliably. Connections are usually made using terminal blocks, such as Wago. But the most reliable type of connecting wires is soldering, and this is the method I used.

To minimize the amount of work at heights near the ceiling, a harness was made in advance, which will only need to be fixed to the ceiling and connected to household electrical wiring.
To determine the length of the harness wires and soldering points, using previously made markings on the ceiling, the distances between the wires for connection and the installation locations of the lamps were measured. The measurement results were immediately applied to the electrical circuit, which was also an electrical circuit.
The harness was made of stranded copper wire with double insulation (the core is entwined with silk thread and covered with polyvinyl chloride). For convenience, the wires were twisted together into a pigtail.

After removing the insulation from the wires, they were tinned with solder. In the second section of the corridor, the wires had to branch out. Therefore, the wires were twisted in pairs and soldered with solder. Please note that to increase the reliability of the insulation, the connection points of the wires were made offset relative to each other.

Before connection, insulating tubes were put on the wires, which, after soldering was completed, were moved to the connection points. To prevent displacement of the insulating tubes, they were fixed on both sides with cambrics tightly fitting on the wires. Together with the displacement of the connection points, this insulation method guaranteed the reliability of the electrical wiring. Insulating the wires could also be done using ordinary insulating tape. To avoid confusion, the cambrics were marked.
When bending the cross beam, a small section of the wire harness passed below the level of the suspended ceiling. This section of electrical wiring ran under the plaster. To ensure reliable insulation, it was additionally covered with a polyvinyl chloride tube.

After the harness was secured to the ceiling, it was time to connect it to the apartment electrical wiring. To do this, the length of the conductors of the double wire coming out of the wall was trimmed with a shift. Since the wire was old, its insulation became rough and, in order not to damage the wires, it was removed thermally using a soldering iron. The cores were stripped and tinned with solder, and insulating tubes were put on them.

All that remains is to wind the ends of the bundle onto the cores of the network wire, solder it with solder and put on the insulating tubes. Thanks to the technology of shifting the wire connections, tubes are needed practically for human safety and aesthetics. Electrical wires cannot accidentally connect to each other.

The connection point is suspended from the ceiling using a clamp with a self-tapping screw. The electrical wiring for the spotlights has been completed.

Temporary electric sockets in places where spotlights will be installed are connected using terminal blocks, the light bulbs are screwed in and the repair can continue.
LED Ceiling Light Installation
on a PVC stretch ceiling
The technology for installing ceiling lamps, including LED ones, on any suspended ceiling of a rigid structure, for example, made of plasterboard, slatted ceiling or Armstrong, is described above. When installing a spotlight on a suspended ceiling made of PVC or other plastic material, it is necessary to install additional fasteners, otherwise the ceiling will sag under the weight of the fixtures.

For these purposes, special fittings are produced. The photo shows a universal platform (ramp) for mounting spotlights. The platform has the shape of a cone, the surface of which consists of steps.

To adjust the diameter of the platform mounting hole to a specific type of ceiling lamp, use a sharp knife to cut off the excess steps from the cone.

The platform is attached to the main ceiling using perforated steel tape. A piece of tape of the required length is unrolled from the roll and cut with metal scissors.

There are two platforms with holes on the platform for fastening the tape with self-tapping screws. If you don’t have a short-length self-tapping screw, you can tighten a long one. The protruding part must be removed with side cutters.

The fittings for spotlights are screwed to the ceiling with self-tapping screws, LED bulbs are connected for testing. Everything works, you need to remove the light bulbs and you can start installing the stretch ceiling.

After the suspended ceiling is installed, the installation of lamps begins. To ensure that the PVC film does not tear and does not heat up too much, before making a hole in it for the lamp, a special plastic thermal insulation ring is glued to the place of its installation with special glue.

The film is cut out along the inner circumference of the ring with a sharp knife, the cartridge is removed and the platform is centered. The perforated tape is easily deformed, and the ceiling bends, so you can easily adjust the height and location of the platform in the horizontal plane.

Installing a ceiling light on a platform will ensure its reliable operation and will prevent the stretch ceiling from sagging and being damaged due to excessive heating when using halogen light bulbs.

In the photo you see the final result of the work on installing spotlights in a suspended ceiling.
Today, many car owners install LED lamps instead of standard halogen lamps. They are more durable and have a better color temperature, which improves visibility of the road.
But according to existing laws, the installation of light not provided for by the standard design, which must be indicated in the operational documentation, will be regarded as an administrative offense.
Owners of such converted vehicles may receive a fine. In some cases, in case of gross violations of the operating conditions of the headlights, the sanctions will be more serious, including deprivation of rights with dismantling and confiscation of the object of violation.
Legal aspects of retrofitting car lighting
Is it allowed to install LED lamps on cars?
Part 1 art. 12.5 Code of Administrative Offenses of the Russian Federation
It is possible to install a mounted spotlight on almost any car, if such an option is allowed according to the technical conditions of the automaker. Additionally, the car can be equipped with one additional forced braking signal, a pair of additional fog lights and a pair of fog lights.
Installation of other lighting sources, both built-in and mounted (not specified by the manufacturer in the operational design documentation of the vehicle) unacceptable. If such changes in the design are detected, it is regarded as a violation of the operating conditions of the vehicle and will lead to an administrative fine.
Are LED low beam lamps allowed?
Part 3 art. 12.5 Code of Administrative Offenses of the Russian Federation
Installation of LED lamps in the front high and low beam headlights, when they are not structurally provided for in the operational documentation, is an administrative violation and entails an administrative fine or withdrawal of the vehicle’s driving privileges for a period of up to one year.
A precedent for an administrative offense will arise if the installed LED lamps violate the light signaling regimes established by law.
Is it possible to install LED lamps in dimensions?
By law, it is not permitted to operate vehicles if the available side and running lights do not meet the following criteria:
- fog lights are standard white or yellow, other colors are not allowed;
- reflective devices are exclusively white;
- white reversing and registration plate lights;
- turn indicators with only yellow or orange lights.

Real operating conditions of LED lamps
Replacing halogen lights with LED lights in a car's parking lights with regular white LEDs that do not change their color (like decorative lighting or installing LED lighting in the cabin) cannot be regarded as a violation of the light indication mode.
The presence of an LED lamp in the side headlight can only be proven by dismantling the headlight cover; naturally, no one will do this. Therefore, the answer to the question whether it is possible to install diode lamps in dimensions is definitely “YES”.
The main problems arise when installing headlights in headlights. The light beam angle of a conventional LED matrix is about 120 degrees, which is significantly less than that of halogen lamps.
A standard reflector in a headlight is not capable of providing the necessary focusing of the light flux under such conditions; this worsens the illumination of the roadway and can blind oncoming drivers. Naturally, such car owners will inevitably be held accountable.
Today, LEDs in headlights are installed as standard only on electric vehicles and some hybrid vehicles. Therefore, in the operational documentation of the vast majority of cars, the class of LED lamps is missing as such.
Installing LED lamps in headlights
Re-equipping headlights with LEDs is the most problematic issue. For high and low beam, only special lamps with reflectors can be used. Any other option will not be focused by the standard reflector.
Among the budget models imported from China, there is no worthy replacement for halogen lamps yet. Their actual brightness may be higher than halogen, but often the LED does not fall into the focus of the reflector. This reduces visibility and quality of lighting.

Is it worth fooling around? Their cost is quite high, even budget options from China start from $50 per pair. In this case, you risk getting a lamp with lower brightness than a halogen one and, in addition, that does not correspond to the focal point of the reflector.
The low beam of such models is usually quite good, but the high beam does not stand up to criticism. Headlights from Cree and Philips already cost more than $100. Their design is much more advanced than copies from China, but even so there is no guarantee that they will definitely fit your reflector.
Is it worth installing LED bulbs in headlights? There are definitely no Chinese copies. Even if you accept some “shortcomings” in their work, the automobile inspector is unlikely to turn a blind eye to this. Brands are indeed capable of providing a high-quality replacement for halogen ones, but first it is still recommended to look for successful experience in converting similar cars.
Excerpt from the document:
“The objective side of the relevant administrative offense can only occur in the event of a simultaneous discrepancy between the color of the lights and the operating mode of such devices with the requirements specified by the manufacturer in the operational documentation, and in cases where additional lighting devices are installed.”
“However, if only the color or operating mode of the light devices installed on the vehicle does not comply with the above requirements, driving such a vehicle may be qualified under Part 1 of Article 12.5 of the Code of Administrative Offenses of the Russian Federation.”
Have you noticed how LEDs have smoothly and imperceptibly entered our lives? They are everywhere. They are everywhere. But just a few years ago, LED optics seemed fantastic. Especially in the auto industry. True, now, every year, more and more automakers are installing LED headlights on their cars instead of standard halogen or xenon optics. This became possible due to the fact that the cost of LED lamps has dropped significantly.
As a result, a widespread fashion for LEDs came into the world and immediately a demand for LED optics appeared in the auto world. But not everyone can afford to buy a new car with LED headlights. Therefore, many companies realized that the time has come to produce LED lamps for low and high beams, which can replace conventional halogen and xenon lamps in headlights. Naturally, many car enthusiasts decided to purchase similar lamps for themselves and install them on their cars. But is it legal? And is there any liability for installing non-factory LED optics? Let's figure it out.
Technologies of the 21st century are increasingly taking over our world. Every year more and more incredible innovative ideas appear, and yesterday’s fantastic technologies are becoming a reality today. The progress of the digital age has not spared the auto industry. Especially car lighting devices, which have undergone significant changes over the past decades.
Moreover, progress in auto lighting technology over the past few years has become more significant than over the past 50 years. As a result, we saw how xenon optics first appeared in the automotive industry. Then, LED. Now - laser light illumination.
But today we are not talking about that. As we have already said, all over the world (including in our country) LED lamps that are installed in car headlights are currently becoming extremely popular.
In recent years, more and more drivers are beginning to think about replacing halogen and xenon headlights with LED ones. How effective is it, etc. you can find out from our review article.
But there is one main question that worries many. Is it possible to install new-fangled LED lamps in conventional headlights designed for halogen or xenon lamps? Is there liability in Russia for installing LED lamps in front optics?
Unfortunately, many car owners think that liability does not exist. After all, these are not xenon lamps, which are prohibited from being installed in halogen headlights. But that's not true. Responsibility actually exists and is very strict. For example, for illegally installing LED low-beam or high-beam lamps in the front optics, the driver may lose his driver's license. Surprised? Here are the details.
Why do many drivers believe that there is no responsibility for installing LED lamps?

Indeed, an interesting paradox has developed in our country. For example, most drivers know that in Russia there is liability for installing xenon lamps in halogen headlights in the form of deprivation of a driver's license. That is why we no longer see a lot of cars on the road with “collective farm” xenon. After all, you must agree, it’s very harsh.
But why then, every year, more and more cars with LED lamps appear on Russian roads, which are usually installed by vehicle owners themselves?
The fact is that a very large number of car enthusiasts believe that LED lamps can be installed in front optics. Especially considering that many sellers of LED low and high beam lamps provide a large number of different certificates and permits, assuring buyers that LED lamps with halogen or xenon optics available for sale are indeed permitted in our country for use and sale.
But in fact, it turns out that most certificates for such lamps at the time of sale are either no longer valid or have been suspended.
Also, do not forget that if the sale of LED lamps is allowed and there are valid permits and certificates, this does not mean that every car owner has the right to install them in the headlights of his car.
Therefore, the presence of certification of LED lamps in Russia does not mean that you have the right to install them in your car. Yes, you can buy it. But no more than that if your headlights are strictly designed to work only with xenon or halogen lamps.

That is, the situation is exactly the same as with xenon lamps, the installation of which is strictly prohibited in cars equipped with front optics designed for halogen incandescent lamps.
Accordingly, by installing low and high beam LED lamps in your halogen or xenon headlights, you will grossly violate current Russian legislation, namely:
Article 12.5 Part 3 of the Code of Administrative Offenses of the Russian Federation:
3. Driving a vehicle with red lights or red reflective devices installed on the front part of it, as well as lighting devices, the color of the lights and the operating mode of which do not comply with the requirements of the Basic Provisions on the admission of vehicles to operation and the duties of officials to ensure road safety, -
entails deprivation of the right to drive vehicles for a period of six months to one year with confiscation of the specified instruments and devices.
What is the responsibility for installing LED lamps in halogen or xenon headlights?

Installing LED low or high beam sources in the front halogen or xenon headlights is equivalent to equipping the car with red special signals. Accordingly, according to the current traffic rules and the Code of Administrative Offenses of the Russian Federation, if a driver illegally and unauthorizedly installs LED lamps in headlights intended for halogen or xenon lamps, he faces liability in the form of deprivation of his driver’s license for up to 1 year.
Agree that this is a very strict measure. Also, do not forget that ignorance of the laws does not exempt you from responsibility. Therefore, under no circumstances should you install LED bulbs on your car in headlights that are not designed for this purpose according to the factory specifications.
Someone might think that the above link to Article 12.5 Part 3 does not directly prohibit the installation of LED lamps in halogen or xenon headlights. But that's not true.
Article 12.5 Part 3 of the Code of Administrative Offenses of the Russian Federation refers us to the provision on the basic requirements for the admission of vehicles to operation and the duties of officials to ensure road safety, for violations of which the driver may be held administratively liable.
So, in particular, according to paragraph 3 of the regulations on the basic requirements for the admission of vehicles to operation and the duties of officials to ensure road safety, the technical condition and equipment of vehicles involved in road traffic, insofar as they relate to road safety and environmental protection environment, must meet the requirements of relevant standards, rules and guidelines for their technical operation.
Accordingly, if a vehicle does not meet the relevant standards, its operation on public roads is prohibited.
What is the liability for installing LED headlights on a car equipped with halogen or xenon headlights?

In principle, none. Yes, of course there is also responsibility for this. But it is very difficult to prove your guilt.
Formally, if instead of halogen headlights you install LED optics on your car from a more expensive configuration of your model, then the maximum you will face is a fine of 500 rubles.
But according to the law, even if instead of xenon or halogen headlights you install on your car LED optics from your same model, but with a richer configuration, you are still required to formalize changes to the design of your car. The truth is that holding you accountable for this will be impossible and unlikely. After all, a traffic police officer will check the markings of the headlights and make sure that the lighting lamps installed in them correspond to the type of use of the optics. And the traffic police officer is unlikely to know that you are using headlights from a different version of the car.
Many drivers tune their cars by replacing the standard low-beam headlight bulbs with LED ones. This is done in order to save money and improve performance in the operation of optics. But in some cases, such modernization of a car may be illegal and entail a fine for LED low beam lamps in accordance with the Code of Administrative Offenses. Actually, LED lighting technology is not an offense. The penalty entails that the changes do not comply with the factory characteristics of the vehicle's optics.
Car manufacturers use different types of headlights as standard:
- halogen;
- xenon;
- LED
Halogen headlights are the most common type of automotive optics. Halogen optical devices are used for high and low beam modes. The operating reserve is 500-1500 hours, the luminous flux power is 1500-2100 lumens.
Xenon lamps have a more complex design, have a high-quality reflector and have good focusing. Can be monoxenon or bi-xenon. The operating reserve is up to 4000 hours, the luminous flux power is up to 3200 lumens.
LED headlights are a modern type of lighting technology, capable of producing a powerful stream of white light with a power of up to 6000 Kelvin. The work reserve is 5000-10000 hours. These are the brightest, most powerful and durable headlights.
Modern LED headlights are installed in some of the latest generation foreign cars - Porsche, Audi, Lexus. If you have one of these models, then the LED lamps in the optics correspond to the standard configuration. But if the factory equipment includes halogen or xenon headlights, then the answer to the question becomes obvious: is it possible to drive with LED lamps? If you change anything in your car without complying with the technical parameters established by the manufacturer, this is a violation of the safety regulations for operating the vehicle. The same consequences entail.
Misconceptions of many drivers
Many drivers are mistaken in thinking that they have the right to change the lamps in the optics of their car themselves. It should be understood that LED headlights and LED lamps are not identical concepts. Despite the fact that manufacturers produce LED lamps with a base suitable for installation in standard headlights, this does not make replacing conventional halogen or xenon lighting devices with LEDs legal. Factory LED headlights are equipped with a stock projection lens designed for that light source.
Therefore, the installation of LED lamps in PTF entails a fine in accordance with the regulations, which deal with non-compliance with vehicle operating requirements and road traffic regulations.
5-KoAP-1.docx
Penalty for installing LED lamps
The fine for diode bulbs in headlights that do not correspond to the factory optics is 500 rubles. The same consequence will occur in any other case of discrepancy between the technical parameters of the standard optics (for example, when replacing halogen lamps with xenon ones or installing xenon optics with LED ones). LED low beam bulbs are fined only if they do not comply with the operational documentation provided by the vehicle manufacturer or have not received confirmation of compliance as part of the vehicle.
When can your rights be revoked?
Deprivation of rights for LED lamps is possible only if independent replacement in any way affects the functioning of optical partings - changes the quantity, color according to GOST, or operating mode. All this meets the requirements of Article 12.5 of the Administrative Code. But in practice, the issue of checking and recording violations is controversial, because the procedure requires appropriate equipment, which not all traffic police posts have.
Methods for checking headlights by traffic police officers
Traffic police officers can check LED lamps for a car on site only visually, or by checking them with the technical documentation for the car. To more accurately establish the parameters of the lamp, a special flat screen with a white matte finish and a device that fixes the relative position of the screen and the vehicle for measuring light indicators are required.
Therefore, in practice it is quite rare, because For the protocol, the traffic police officer requires more compelling reasons. They are usually limited to a verbal warning or a fine. In the latter case, it will allow you to clarify the grounds for the order and, if necessary, challenge it in court.