This program is designed to increase transparency and openness of the core activities of government agencies and is responsible for the management of public finances.
With the help of the GIS “Electronic Budget” planning program, the quality of management of government agencies is improved through the introduction of information and communication technologies and the creation of a unified information space in the management environment of state, municipal, and public finances.
The concept for developing the creation of the GIIS “Electronic Budget” was confirmed in RP No. 1275-r dated July 20, 2011. The operating procedure of the system is regulated by Government Decree No. 658 of June 30, 2015.
The system consists of several subsystems aimed at achieving certain goals in the financial sector:
- procurement management;
- HR management;
- budget planning;
- cash management;
- income and expense management;
- management of regulatory reference information, etc.
The following users must register and work in the program:
- bodies of state power and local self-government, as well as state extra-budgetary funds;
- organizations that are participants in the budget process and financed through the state budget, as well as legal entities receiving funds from the budget of the Russian Federation;
- individuals and other persons - participants in the budget process;
- organizations carrying out procurement activities in accordance with the norms of 223-FZ.
Placement of schedules is carried out using the “Financial Management” subsystem, if the customer is the Russian Federation. BU, AU at the federal and municipal level, as well as other customer organizations can create and publish schedule plans directly in the Unified Information System. Institutions must duplicate all procurement documentation in the electronic book (Order of the Ministry of Finance No. 173n dated December 29, 2014), and then transfer it to TOFK.
"Electronic budget" of the Ministry of Finance and the Federal Treasury
Login using the “Electronic Budget” certificate of the Ministry of Finance is carried out using the link http://ssl.budgetplan.minfin.ru. Using the subsystems located on the Ministry of Finance website, you can carry out the following actions:
- study information on filling out forecast forms;
- formulate state assignments and budget estimates;
- implement accounting and budget accounting procedures for institutions;
- view various registers and reference information;
- fill out information and documentation on government order procedures and procurement activities;
- ensure information interaction;
- create, save and send to the authorized body documentation on planning and execution of the budget, as well as on the implementation of control measures, etc.
The “Electronic Budget” system of the Federal Treasury has the following functionality:
- maintaining a consolidated register of UBP and NUBP;
- interaction with the official website www.bus.gov.ru;
- development and maintenance of various industry lists;
- work with the Unified Portal of the Budget System of the Russian Federation;
- procurement management;
- record keeping and reporting;
- cost management.
Connection and getting started
The regulations for connecting, logging into the “Electronic Budget” (personal account) and starting work in it are fixed in the letter of the Ministry of Finance of the Russian Federation No. 21-03-04/35490 dated 06/17/2016. First of all, the organization must issue an order appointing persons responsible for work in the electronic security system and identifying employees authorized to prepare documentation placed in the subsystems. The order must confirm the responsibilities of each responsible employee. The order must necessarily contain signatures indicating that each employee is familiar with the contents of the internal organizational document.
SAMPLE ORDER (picture)
In order to start working, the user must:
1. Carry out a complete diagnosis and preparation of automated workstations for work with GIIS “EB” in accordance with the requirements established in Appendix 1 to the Connection Procedure.
2. Prepare qualified digital signature keys for each performer. New keys are obtained only for those who have not previously worked in the UIS. The rest can use their digital signatures that are valid in the Unified Information System.
3. Install the Windows Installer software, all necessary drivers for the user certificate media, the Continent TLS Client and Jinn-Client programs.

4. Complete and send to TOFK an application for connection using a special unified form (letter of the Ministry of Finance No. 21-03-04/61291 dated 10/20/2016). The application must be accompanied by an order for the appointment of responsible persons, files of digital signature certificates, consent signed by each responsible employee for the processing of personal data, an application and power of attorney to receive cryptographic information in the form approved by the Ministry of Finance (letter No. 21-03-04/35490 dated 06/17/2016) .
5. Wait for the results of checking the package of documents submitted to TOFK with the application for connection, and, if necessary, make all corrections and additions.
6. Upon successful verification, install CIPF at the workplace, register new performers in the Unified Information System, install new EDS key certificates and enter data on responsible employees into the electronic system while simultaneously defining the roles of each performer.


7. Connect to the “Electronic Budget” system, enter your personal account and start working in it.
A detailed description of the installation and configuration of the components necessary to work with the Electronic Budget can be found in this manual.
Brief description of the required actions:
- It is advisable to install CryptoPro version 4.0.9944 or higher (). If you previously installed an older version, you can install on top of it.
- Install Jinn-Client version 1.0.3050.0 (). If you previously installed an older version, you can install on top of it. The license key can be used from the previous version.
- Install and configure Continent TLS version 2.0 (). If an older version was previously installed, it must be removed.
- Convert containers of private keys of electronic signatures intended for entering the Electronic Budget from PKCS#12 format to PKCS#15 format (conversion instructions). There can only be one valid PKCS#15 format container on one flash drive, so each signature will need its own flash drive.
- Install CryptoPro EDS Browser plug-in.
- Install certificates in the trusted root certificate store and certificates in the intermediate root certificate store ().
- Install a personal certificate in the “Personal” certificate store (it is recommended to use CryptoPro and install a certificate marked “place in container”).
Login to the Electronic Budget (GOST 2012)
- Open Internet Explorer 11 or another browser configured to work with Electronic Budget and go to: http://lk2012.budget.gov.ru/udu-webcenter .
- A window will appear asking you to select the user certificate with which you want to log into the Electronic Budget.
- After selecting the required certificate, a window will appear where you must select the private key storage (removable disk or other media other than the registry) in the upper part, and enter a password in the lower part, if required.
GOST 2001 (certificates issued before 02/01/2019)
- It is advisable to install CryptoPro ();
- Install Jinn-client ();
- Install the CUBE plugin to work with electronic signatures in browsers cubesign.msi which is located in the directory (folder) with the Jinn-client installation file;
- Install Continent TLS ();
- Download the root certificate of the Continent TLS server (used from 06/25/2018 UNTIL 09.09.2019) (the new certificate will be posted on 09/06/2019 at 18:00 (Moscow time)) (it is advisable to place it in the root of the disk) in case of a planned change of the root certificate, you must use the instructions;
- Setting up Continent TLS:
- indicate address: lk.budget.gov.ru;
- port: 8080 ;
- select the root certificate of the Continent TLS server;
- use an external proxy if you really use it (sometimes when using a proxy, disabling this function helps to connect to the Internet). Settings can be found: Start > All Programs > Security Code > TLS Continent > Settings.
- go to "Tools > Add-ons > Plugins" in the Cube system and Jinn-Client items you must select Always enable;
- go to "Settings > Advanced > Network" and click the "Configure..." button;
- select manual configuration of the proxy service: in the HTTP proxy line, enter 127.0.0.1 port: 8080 (Leave the rest as default. Empty lines);
- click "OK";
- go to “Settings > Privacy > History”, you must select the “will not remember history” option.
Login to the Electronic Budget (GOST 2001)
- Opening Mozilla Firefox and go to: http://lk.budget.gov.ru/udu-webcenter ;
- The “Select user certificate” window will appear where you first need to select a storage (removable disk or registry), then the user certificate itself;
- Upon successful login, information will appear stating that this is an “Electronic Budget” indicating the support phone number 8-800-222-27-77.
D="P0001" CLASS="formattext topleveltext">
MINISTRY OF FINANCE OF THE RUSSIAN FEDERATION
User's guide for working with the budget planning subsystem of the state integrated information system for public finance management "Electronic Budget" for generating an expense report form, a source of financial...
User's guide for working with the budget planning subsystem of the state integrated information system for public finance management "Electronic Budget" for generating a report form on expenses, the source of financial support for which is a subsidy (budgetary investments, interbudgetary transfers) and their coordination for the main managers of federal budget funds
Version 2017.01
List of terms and abbreviations
|
Budget classification of the Russian Federation |
|
|
Russian Federation |
|
|
State integrated information system for public finance management "Electronic budget" |
|
|
Full Name |
|
|
Federal executive body |
1 System Launch
To start working with the System, you must perform the following sequence of actions:
- launch the Internet browser "Internet Explorer" by double-clicking the left mouse button on its shortcut on the desktop or click on the "Start" button and in the menu that opens, select the item corresponding to the Internet browser "Internet Explorer";
- enter the address in the address bar of your Internet browser: http://budget.gov.ru/lk;
Figure 1. Unified portal of the budget system
On the page of the Unified Budget System Portal, you must click on the button “Go to the Budget Planning subsystem” (Figure 1);
Note. If the transition to the "Budget Planning" subsystem has not been made, you must enter the address in the address bar of your Internet browser: https://ssl.budgetplan.minfin.ru/http/BudgetPlan/.
Figure 2. “Login with certificate” button
In the window that opens, click on the “Login with certificate” button (Figure 2).
After selecting the authentication method “Login by certificate”, the System automatically requests the electronic signature verification key certificate and the certificate PIN code, then the user-owner of the certificate is searched for, and the main System window opens.
Figure 3. Login button
After choosing a login, you must click on the “Login” button (Figure 3).
Note. If different users use the same certificate for authorization (for example, one authorized person has different roles), the System will prompt you to select a specific user.
Figure 4. System main window
As a result, the main System window will open (Figure 4).
2 Generating agreement report templates
Agreement report templates are generated in the template registry.
Figure 5. Go to the register of agreement templates
To go to the template registry you need (Figure 5):
- select the "Menu" tab (1);
- select the subsection "Directories" (3);
- open the “Template Registry” item (4).
Figure 6. Template Registry tab
As a result, the “Template Registry” tab will open, in which you need to go to the “Report Templates” tab (Figure 6).
Figure 7. Function buttons
To work with the register of agreement templates, the System implements the following functional buttons (Figure 7):
- "Add" - adding a report template;
- "Print document template" - generation of a printed form of a report template on the user's workstation with a *.pdf extension;
- "Agree" - approval of the report template;
- "Edit" - editing the report template;
- "Delete" - deleting a report template.
Figure 8. Report template columns
Information about report templates is presented in the following columns of the table (Figure 8):
- "federal executive authority";
- "Status";
- “Name of the person approving/approving”;
- "Template number";
- "Date of creation";
- "Date of change";
- "Agreement type";
- "Template name".
Figure 9. List sorting
If you need to display hidden columns, click on the button (1) and select the item from the drop-down list
(2) and check the box next to the columns that need to be displayed (3) (Figure 9).
Figure 10. Search by value in columns
To quickly search for records, the System has implemented search fields by column values (Figure 10).
2.1 Create an agreement report template
Figure 11. "Add" button
To generate a template for agreement reports, you must click on the “Add” button in the template register (Figure 11).
Figure 12. Window "Report template input form"
As a result, the “Report Template Input Form” window will open, containing tabs (Figure 12):
- "Basic information";
- "Header part";
- "Reporting sections";
- “Signatures”.
In the "Basic Information" tab, in the "Requires approval" field, you must check the box if the agreement report template requires approval.
The "Template number" field is filled in automatically and is not available for editing. The template number is in the format PPP-TT-NNN, where PPP is the Chapter code in accordance with the budget classification of the Russian Federation from the directory "Chapters on BC", TT is the type of agreement, NNN is the serial number of the template.
The "Date of creation" field is filled in automatically and is not available for editing.
The "Agreement Type" fields are filled in by selecting a value from the drop-down list.
The "Template name" field is filled in manually by the user.
The "Template numbering option" field is filled in by selecting a value from the drop-down list.
Figure 13. “Add TAG” button
The "External number mask" field is filled in manually or by clicking on the "Add TAG" button (Figure 13).
Figure 14. Insert button
As a result, the “Select Tag” window will open, in which you need to select a tag with one click of the left mouse button and click on the “Select” button (Figure 14).
The "Form code, by:" field is filled in by selecting a value from the drop-down list.
The "Form code, number" field is filled in manually using the keyboard.
Important! The fields "Agreement Type", "Template Name" and "Template Numbering Option" are required.
To save the entered data, you must click on the “Save” button (Figure 15).
Figure 16. New line
As a result, a new line will be displayed in the register of agreement templates (Figure 16).
To fill out the “Header”, “Reporting Sections” and “Signatures” tabs, you need to open the added line by double-clicking the left mouse button.
2.1.1 Filling out the "Header" tab
Figure 17. "Add Title Row" button
To generate a line, in the “Header” tab, click on the “Add title line” button (Figure 17).
Figure 18. "Edit Object" window
As a result, the “Editing Object” window will open (Figure 18).
The "Part number" field is filled in automatically and is not available for editing.
Important! The fields "Line number" and "Line name" are required.
To save the entered data, click on the “Save” button (Figure 19).
Figure 20. "Header" tab
As a result, a line will be added to the “Header” tab (Figure 20).
Figure 21. Moving a row "Up" and "Down" in order
To move the title line “Up” and “Down” in order, you need to select the line and click on the corresponding button or (Figure 21). The lines will be displayed in the printed report form in the specified order.
Next, you need to go to the “Reporting Sections” tab.
2.1.2 Filling out the "Reporting Sections" tab
Figure 22. “Reporting Sections” tab
The "Report Name" field is filled in manually using the keyboard (Figure 22).
Figure 23. "Add" button
To add a section, click on the “Add” button (Figure 23).
Figure 24. "Edit Object" window
As a result, the “Editing Object” window will open (Figure 24).
The "Sequence number" field is filled in automatically and is not available for editing.
The "Name" field is filled in manually using the keyboard.
Important! The "Name" field is required.
Figure 25. Adding a column
To add a column, click on the “Add Column” button and select the appropriate item (Figure 25).
Figure 26. Line in the "Edit Object" window
As a result, a line will be added in the “Edit Object” window in which the “Column Name” and “Width” fields are filled in manually from the keyboard (Figure 26).
Figure 27. Moving a column "Up" and "Down" in order
To move the column “Up” and “Down” in order, you need to select the row and click on the corresponding button or (Figure 27). The lines will be displayed in the printed report form in the specified order.
To save the entered data, click on the “Save” button (Figure 28).
Figure 29. Preview button
To preview and send the report template for printing, click on the “Preview” button (Figure 29).
Figure 30. View window
The “View” window that opens will display the data from the fields of the report template section (Figure 30).
Figure 31. Closing the Preview window
To close the View window, click on the close window icon (Figure 31).
Figure 32. Close button
To close the “Edit Object” window, click on the “Close” button (Figure 32).
Figure 33. Line in the "Reporting Sections" tab
As a result, a line will be added to the “Reporting Sections” tab (Figure 33).
Next, you need to go to the “Signatures” tab.
2.1.3 Filling out the "Signatures" tab
Figure 34. "Add line" button
To add a line, click on the “Add line” button (Figure 34).
Figure 35. "Edit Object" window
As a result, the “Editing Object” window will open (Figure 35).
The "Line number" field is filled in manually using the keyboard.
The "Line part number" field is filled in automatically and is not available for editing.
The "Line name" and "Line content" fields are filled in manually using the keyboard.
Important! The fields "Line number" and "Line content" are required.
Adding a tag is carried out similarly to the description above.
To save the entered data, click on the “Save” button (Figure 36).
Figure 37. Line in the "Signatures" tab
As a result, a line will be added to the “Signatures” tab (Figure 37).
Figure 38. Moving the row "Up" and "Down" in order
To move the title line “Up” or “Down” in order, you need to select the line and click on the corresponding button or (Figure 38). The lines will be displayed in the printed report form in the specified order.
To save the entered data and close the “Report Template Input Form” window, click on the “Save” button (Figure 39).
2.2 Creation of a printed form of a template for agreement reports
Figure 40. Button "Print document template"
To view the printable form of the agreement report template, you must select the corresponding entry with one click of the left mouse button and click on the “Print document template” button (Figure 40).
As a result, a printed form of the agreement report template with a *.pdf extension will be downloaded to the user’s workstation.
3 Placing a resolution on the report under the agreement by the organization that provided the subsidy
The affixing of a resolution to the report under the agreement by the organization that provided the subsidy is carried out in the register of reports on the implementation of expenses, the source of financial support of which is subsidies (budgetary investments, interbudgetary transfers).
Figure 41. Go to the register of reports on subsidy expenses
To go to the register of reports on subsidy expenses you need (Figure 41):
- select the "Menu" tab (1);
- select the “Agreements” section (2);
- select the subsection “Register of reports on subsidy expenses” (3).
Figure 42. Tab "Register of reports on expenditures, the source of financial support for which are subsidies (budgetary investments, interbudgetary transfers)"
As a result, the tab “Register of reports on the implementation of expenses, the source of financial support of which are subsidies (budgetary investments, interbudgetary transfers)” will open, in which you need to go to the tab corresponding to the budget cycle with which the work will be carried out (Figure 42).
Figure 43. Function buttons
To work with the register of reports on the implementation of expenses, the source of financial support for which are subsidies (budgetary investments, interbudgetary transfers), the following functional buttons are implemented in the System (Figure 43):
- "Refresh" - page refresh;
- "Version":
- [View version]- viewing the version of the agreement report;
- "Seal":
- [Print Register]- generation of a printed form of the register of reports on expenses, the source of financial support of which are subsidies (budgetary investments, interbudgetary transfers) to the user’s workstation with the extension *.xls;
- [Print Document]- generation of a printed form of the agreement report on the user’s workstation with the extension *.pdf or *.doc;
- “Create a resolution” - formation of a resolution (“Agreed” or “Not agreed”);
- “Confirmation of the report” - creation of an approval sheet, approval (if necessary) and approval of the imposed resolution;
- “Document signatures” - viewing electronic signatures;
- "Resolution history" - view the history of resolutions.
Figure 44. “Create resolution” button
To create a resolution, you need to select the corresponding line with one click of the left mouse button and click on the “Create resolution” button (Figure 44).
Note. If the agreement report was not previously brought to the “Approved” status of the Recipient, then it is not displayed for the user of the federal executive authorities.
Figure 45. Solution window
As a result, the approval decision window will open (Figure 45).
The fields “Date, time of receipt for approval” and “Name of GRBS, position, full name” are filled in automatically.
In the "Distribution of budget allocations" field, you must select the value "Agreed" or "Not agreed" from the drop-down list by clicking on the button.
Important! The field "Distribution of budget allocations" is required.
The "Text of the approval decision" field is filled in manually.
Important! The "Text of the decision on approval" field is required if the value "Not approved" is selected in the "Decision" field.
The field “Name, position, structural unit of the author of the resolution” is filled in automatically.
After filling in the fields, you must click on the “Save” button (Figure 46).
3.1 Formation of an approval sheet
Figure 47. "Report Confirmation" button
To generate an approval sheet, you must click on the “Report Confirmation” button (Figure 47).
Figure 48. Approval sheet
In the “Approval Sheet” window that opens, you need to add approvers and approvers by clicking on the “Add” button in the corresponding blocks (Figure 48).
Figure 49. Select button
In the “Select Users” window that opens, you must select the corresponding entry with one click of the left mouse button and click on the “Select” button (Figure 49).
Important! It is possible to select several approvers and one approver from the list. There can only be one approver. The approval sheet cannot be saved if an approver is not selected.
Figure 50. Saving the approval sheet
After selecting the approvers and approvers, you must click on the “Save” button (Figure 50).
As a result, the document status will take the value “Under approval”.
Before the approval process begins, the author of the approval sheet can edit the list of approvers and approvers.
Important! Removing a previously selected approving or approving person is possible only with the subsequent replacement of the approving or approving person.
Figure 51. "Edit" button
To change the approving person, you must click on the “Edit” button (Figure 51).
Figure 52. "Delete" button
After this, you need to click on the “Delete” button (Figure 52).
Figure 54. "Add" button
After this, to add a new approving person, you must click on the “Add” button (Figure 54).
To save the changes you have made, you must click on the “Save” button (Figure 56).
Editing a previously selected approver is carried out in the same way as described above.
After generating the approval sheet, those included in the list of approvers and approvers sequentially approve the document in accordance with paragraphs 3.2 and 3.3 of this user manual.
3.2 Negotiation
Figure 57. "Report Confirmation" button
To approve a document, the person approving needs to select the corresponding line with one click of the left button and click on the “Report Confirmation” button (Figure 57).
If necessary, the approving person can appoint another person responsible for the approval as described in paragraph 3.1 of this user manual.
Figure 58. "Agreed" button
In the “Approval Sheet” window that opens, you must click on the “Agreed” button (Figure 58).
In the “Editing Object” window, if necessary, fill in the “Comment” field and click on the “Save” button (Figure 59).
After this, the document will change to the “Approved” status.
To refuse approval of a document, the approver must select the corresponding line with one click of the left mouse button and click on the “Report Confirmation” button (Figure 57).
Figure 60. Button "Not agreed"
In the “Approval Sheet” window that opens, you must click on the “Not approved” button (Figure 60).
In the "Editing Object" window, you must fill in the "Comment" field and click on the "Save" button (Figure 61).
Important! The "Comment" field is required.
After this, the document will change to the “Not Approved” status.
3.3 Statement
Figure 62. “Report Confirmation” button
To approve the agreed document, the approver must select the corresponding line with one click of the left mouse button and click on the “Report Confirmation” button (Figure 62).
If necessary, the approver can appoint another person responsible for approval as described in paragraph 3.1 of this user manual.
Figure 63 "Approved" button
In the “Approval Sheet” window that opens, you must click on the “Approved” button (Figure 63).
After this, the document will change to the "Approved" status.
To refuse approval of a document, the approver must select the corresponding line with one click of the left mouse button and click on the “Report Confirmation” button (Figure 62).
Figure 64. "Not approved" button
In the “Approval Sheet” window that opens, you must click on the “Not approved” button (Figure 64).
After this, the document will change to the “Not Approved” status.
Editing and reconciliation
Figure 65. “Report Confirmation” button
To eliminate comments and re-send the document for approval, you need to select the inconsistent line with one click of the left mouse button and click on the “Report Confirmation” button (Figure 65).
Figure 67. Button "Approval history"
To view the approval history, in the “Approval Sheet” window, click on the “Approval History” button (Figure 67).
Electronic document text
prepared by Kodeks JSC and verified against:
official website of the Russian Ministry of Finance
www.minfin.ru, 04/18/2017
User's guide for working with the budget planning subsystem of the state integrated information system for public finance management "Electronic Budget" for generating a report form on expenses, the source of financial support for which is a subsidy (budgetary investments, interbudgetary transfers) and their coordination for the main managers of federal budget funds
| Document's name: | User's guide for working with the budget planning subsystem of the state integrated information system for public finance management "Electronic Budget" for generating a report form on expenses, the source of financial support for which is a subsidy (budgetary investments, interbudgetary transfers) and their coordination for the main managers of federal budget funds |
| Receiving authority: | Ministry of Finance of Russia |
| Status: | Active |
| Published: | The document was not published |
| Acceptance date: | 07 April 2017 |
| Start date: | 07 April 2017 |
Setting up an automated workplace of the Electronic Budget occurs in several stages; they are not complicated, but require care. We do everything according to the instructions for setting up an electronic budget. Short and to the point...
Electronic budget setting up a workplace
Root certificate electronic budget
Create a key folder in My Documents to store downloaded certificates in this folder:
On the website http://roskazna.ru/gis/udostoveryayushhij-centr/kornevye-sertifikaty/ in the GIS menu -> Certification Authority -> Root certificates, you need to download “ Root certificate (qualified)" (see figure), or if you received a flash drive with certificates, copy them from the Certificates folder.
Certificate Continent TLS VPN
The second certificate that needs to be downloaded is the Continent TLS VPN certificate, but I couldn’t find it on the new roskazna website, so I’m putting a link from my website. Download the Continent TLS VPN certificate to the key folder; we will need it later when we configure the Continent TLS client program.
Install the downloaded Root certificate (qualified) for working with the electronic budget.
In the START menu -> All programs -> CRYPTO-PRO -> launch the Certificates program.
Go to Certificates as shown in the figure below:
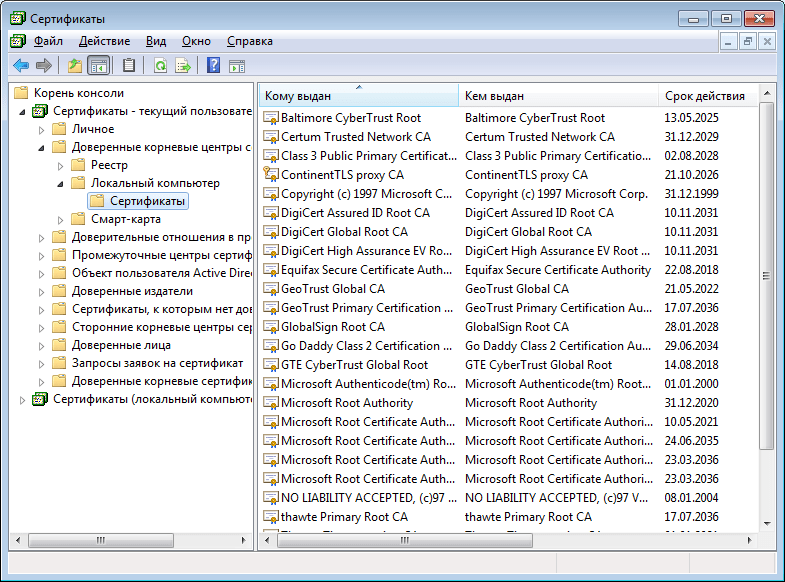
Go to the menu Action - All tasks - Import, the Certificate Import Wizard window will appear - Next - Browse - Find the downloaded Root certificate (qualified) in our case it is located in My Documents in the key folder

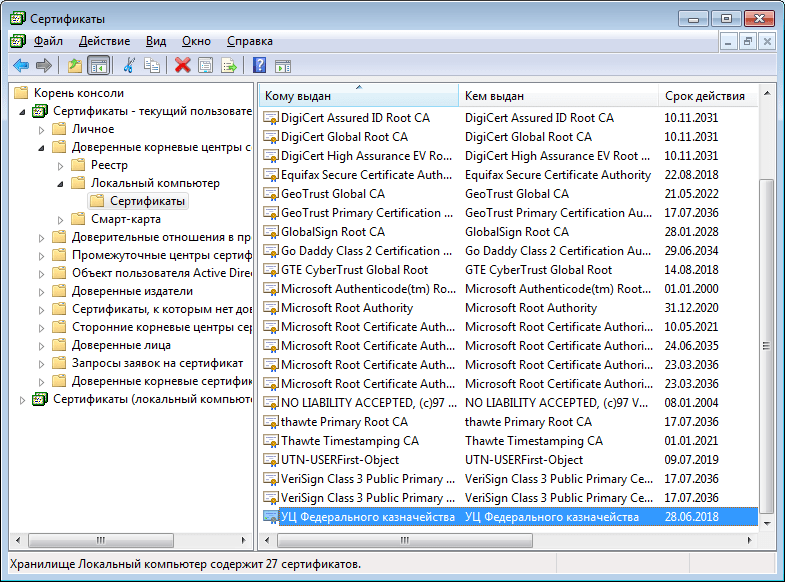
If everything was done correctly, the root certificate of the Federal Treasury CA will appear in the certificates folder.
Installation of "Continent TLS Client" for working with electronic budget
Continent_tls_client_1.0.920.0 can be found on the Internet.
Unpack the downloaded archive, go to the CD folder and run ContinentTLSSetup.exe

From the item, click on Continent TLS Client KC2 and start the installation.


We accept the terms
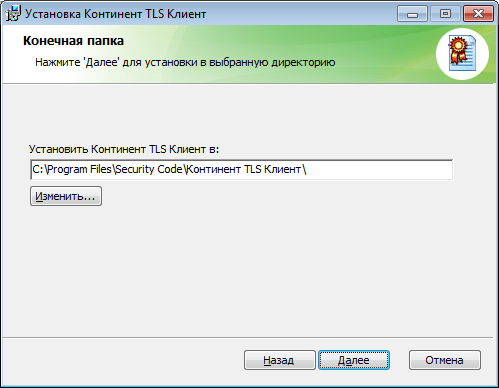
Leave the destination folder as default

In the configurator launch window, check the box next to Launch configurator after installation is complete.
During installation, the Service Settings window will appear:

Address - indicate lk.budget.gov.ru
Certificate - select the second certificate downloaded earlier in the key folder.

Click OK and complete the installation, Done.

When asked to reboot the operating system, we answer No.
Installing the electronic signature tool “Jinn-Client”
You can download the Jinn-Client program on the Internet.
Go to the Jinn-client - CD folder, run setup.exe
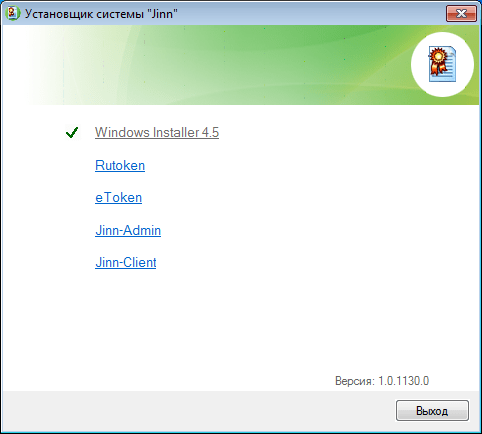
Click from the Jinn-Client list, the program installation starts

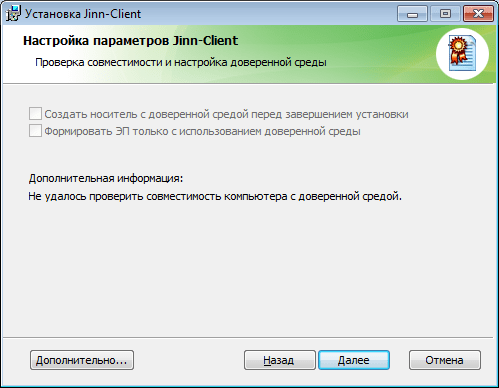
We ignore the error, click Continue, Next, accept the agreement and click Next.

Enter the issued license key
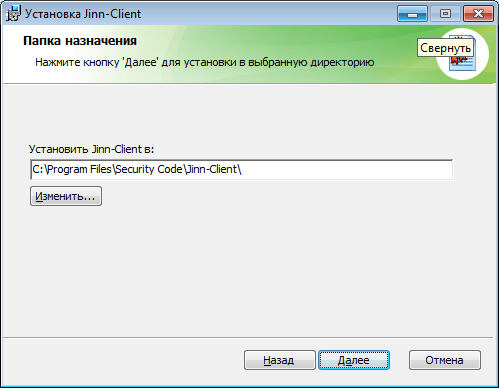
Install the program as default, click Next

We complete the installation, answer the question about rebooting the operating system No
Installing a module for working with electronic signatures “Cubesign”
If you need an archive with the program, write in the comments.
Run the installation file cubesign.msi


Setting up the Mozilla Firefox browser to work with the Electronic Budget.
1. Open the "Tools" menu and select "Settings".
2. Go to the “Advanced” section to the “Network” tab
3. In the “Connection” settings section, click the “Configure…” button.
4. In the connection parameters window that opens, set the value
"Manually setting up a proxy service."
5. Set the values of the HTTP proxy fields: 127.0.0.1; Port: 8080.

6. Click the “OK” button.
7. In the “Settings” window, click the “Ok” button.
Login to your personal account of the Electronic Budget
A window will open asking you to select a certificate for logging into your Electronic Budget personal account.

We select a certificate to enter the Personal Account of the Electronic Budget, if there is a password for the closed part of the certificate, write it down and click OK, then the Personal Account of the Electronic Budget will open.
