Today we will analyze the project of connecting a PIR sensor (motion) to Arduino and organize automatic sending of e-mail when the sensor is triggered. Arduino is the heart of this project - it reads the IR sensor, and when motion is detected, it gives the computer a command via the USB port to send an email. Processing of the signal coming to the computer is implemented using the Python program.
Model Assembly Parts List
To build the project described in this tutorial, you will need the following parts:
- Arduino UNO or equivalent (more on how to choose an Arduino);
- PIR sensor ($2 will do)
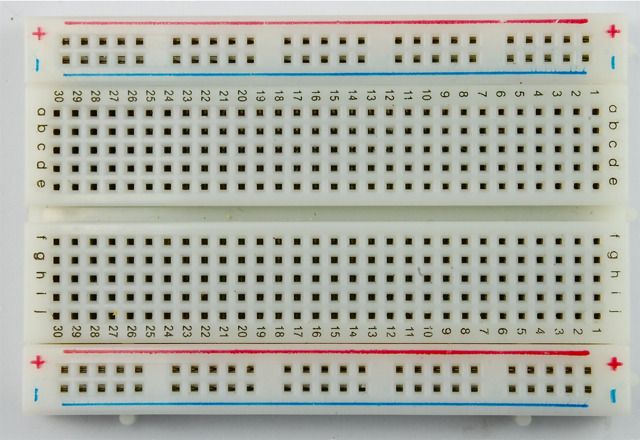
- brainboard (can be bought for $2.4);
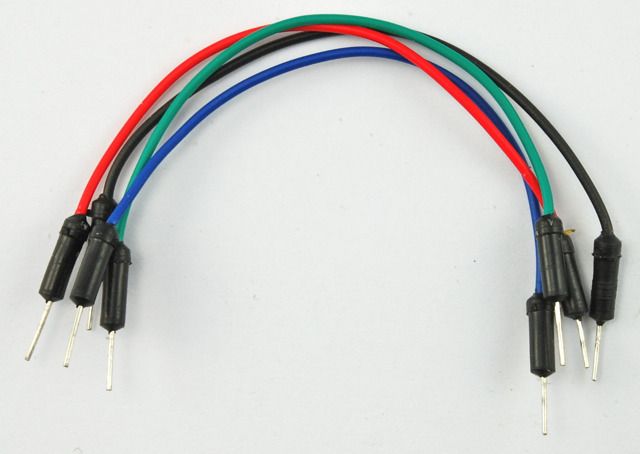
- male-male wires (you can buy such a bundle with a large margin).

You will also need a computer with an Internet connection, through which we will send e-mail! The role of the computer in this lesson can be played.
Scheme of connecting a PIR sensor to Arduino
Only the PIR sensor needs to be connected to the Arduino in this project, so the wires from the sensor can be connected directly to the Arduino. But since in this case, it is more convenient to hold the wires a little looser using the c brainboard scheme:

Arduino sketch
The Arduino will send a message over the USB Serial connection when motion is detected. But if you send an e-mail every time the sensor is triggered, you can get a huge amount of letters. Therefore, if too little time has passed since the last signal, we will send another message.
int pirPin = 7;
int minSecsBetweenEmails = 60; // 1 min
long lastSend = -minSecsBetweenEmails * 1000;
void setup()
{
pinMode(pirPin, INPUT);
Serial.begin(9600);
}
void loop()
{
long now = millis();
if (digitalRead(pirPin) == HIGH)
{
if (now > (lastSend + minSecsBetweenEmails * 1000))
{
Serial.println("MOVEMENT"); lastSend = now;
}
else
{
Serial.println("Too soon"); )
}
delay(500);
}
The "minSecsBetweenEmails" variable can be changed to another reasonable value. In the example it is set to 60 seconds and emails will not be sent for more than one minute. To keep track of when the command to send e-mail was last given, the variable "lastSend" is used. We initialize it with a negative number equal to the number of milliseconds specified in the "minSecsBetweenEmails" variable. This ensures that we handle the PIR sensor triggering as soon as the Arduino sketch is launched. The loop uses the Millis() function to get the number of milliseconds from the Arduino and compare it to the time since the last sensor triggered and the corresponding "MOVEMENT" message sent. If the comparison shows that too little time has passed since the last sensor operation, then despite the fact that the movement was detected, we send the message "Too soon" (Too early). Before writing a Python program to process the signal coming from the Arduino to a computer or Raspberry Pi via USB, you can check the operation of the program on the Arduino by simply opening the Serial Monitor on the Arduino IDE.

Installing Python and PySerial
If the project uses a Linux computer, such as a Raspberry Pi, Python is already installed. If you are using a computer with a Windows operating system, then Python must be installed. In any case, you will need to install the PySerial library in order to communicate with the Arduino.
Installing Python on Windows
To install Python on Windows, download the installer from https://www.python.org/downloads/ . There have been reports of problems with PySerial on Windows when using Python 3, so we are using Python 2. Once Python is installed, a group will appear in the Start menu. But to install PySerial, you will need to use Python from the command line, so add the appropriate directory to the Windows PATH variable.  To do this, you need to go to the Windows Control Panel, find System Properties (System Properties). Then click on the button labeled Environment Variabes and in the window that appears select Path at the bottom of System variables. Press the Edit button, and then at the end of the "Variable value", without deleting the existing text, add "; C:\Python27". Do not forget ";" after each specified folder. To check that the PATH variable has been changed correctly, at the command line, enter the command "python". A similar picture should appear:
 Installing PySerial
Regardless of the operating system you are using, download the .tar.gz installation package for PySerial 2.6 from https://pypi.python.org/pypi/pyserial Get a file called pyserial-2.6.tar.gz When using Windows, you need to unpack the file into a folder. Unfortunately, this is not a regular ZIP file, so you may need to download eg 7-zip (http://www.7-zip.org/). When using a Linux computer, such as when using a Raspberry Pi in this project, you need to open a terminal session, execute the "CD" command specifying the folder where pyserial-2.6.tar.gz was downloaded, and then run the following command to unpack the installer :
$ tar -xzf pyserial-2.6.tar.gz
Next, regardless of the operating system used, on the command line, execute the “CD” command specifying the pyserial-2.6 folder and execute the command:
sudo python setup.py install
Python code
Now let's create a Python program. To do this, copy this code into a file called "movement.py". On Linux a "nano" editor can be used, on Windows probably the easiest way to make a file is with the Python 'IDLE' editor (accessible from the Python program group on the start menu).
import time
import serial
import smtplib
TO=" [email protected]"
GMAIL_USER=" [email protected]"
GMAIL_PASS = "putyourpasswordhere"
SUBJECT = "Intrusion!!"
TEXT = "Your PIR sensor movement detected"
ser = serial.Serial("COM4", 9600)
def send_email():
print("Sending email")
smtpserver = smtplib.SMTP("smtp.gmail.com",587)
smtpserver.ehlo() smtpserver.starttls()
smtpserver.ehlo smtpserver.login(GMAIL_USER, GMAIL_PASS)
header = "To:" + TO + "\n" + "From: " + GMAIL_USER
header = header + "\n" + "Subject:" + SUBJECT + "\n"
print header
msg = header + "\n" + TEXT + "\n\n"
smtpserver.sendmail(GMAIL_USER, TO, msg)
smtpserver.close()
while True:
message = ser.readline()
print(message)
if message == "M" :
send_email()
time.sleep(0.5)
Before running the Python program, we make some changes (all of them at the top of the program). The program assumes that emails are generated from a Gmail account. If it doesn't exist, register it (even if it's only for this project). Change the value of the "TO" variable to the email address where notifications will be sent. We change the value of "GMAIL_USER" to the Gmail email address and, accordingly, the password in the next line (GMAIL_PASS). You can also change the subject and text of the message to be sent ("SUBJECT" and "TEXT"). You need to set the serial port that the Arduino is connected to in the line ser = serial.Serial("COM4", 9600) For Windows, it will be something like "COM4" for Linux - something like "/dev/tty.usbmodem621" . To which port of the computer the board is connected, we look in the Arduino IDE in the lower right corner.  After these changes, run the program from the command line / terminal: python movement.py Done! When the PIR sensor is triggered, a message will be sent to the specified e-mail shortly.
What else can you do with a PIR sensor
Now, having mastered the means of sending email with Arduino, you can start expanding the capabilities of the project. You can add other sensors and, for example, email yourself hourly temperature reports. Of course, the PIR sensor can be used directly with the Arduino without connecting to a computer. In this case, when the sensor is triggered, you can turn on a warning sound signal, flash the LED, or turn on the lighting in the room (via a high-voltage relay).
The arduino motion sensor allows you to track the movement of objects that emit heat (people, animals) in a closed area. Such systems are often used in domestic conditions, for example, to turn on the lighting in the entrance. In this article, we will consider connecting PIR sensors in Arduino projects: passive infrared sensors or pyroelectric sensors that respond to movement. Small dimensions, low cost, ease of operation and no connection difficulties make it possible to use such sensors in various types of alarm systems.
The design of the PIR motion sensor is not very complicated - it consists of a pyroelectric element, which is highly sensitive (a cylindrical part with a crystal in the center) to the presence of a certain level of infrared radiation in the coverage area. The higher the temperature of the object, the greater the radiation. A hemisphere is installed on top of the PIR sensor, divided into several sections (lenses), each of which provides focusing of thermal energy radiation on different segments of the motion sensor. Most often, a Fresnel lens is used as a lens, which, due to the concentration of thermal radiation, allows you to expand the sensitivity range of the Arduino infrared motion sensor. 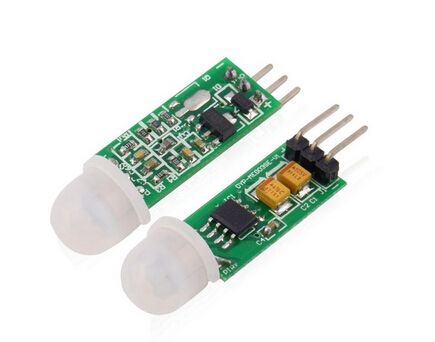
PIR-sensor is structurally divided into two halves. This is due to the fact that it is the presence of movement in the sensitivity zone that is important for the alarm device, and not the level of radiation itself. Therefore, the parts are installed in such a way that when one more level of radiation is captured, the output will be a signal with a high or low value.
The main technical characteristics of the Arduino motion sensor are:
- The detection zone of moving objects is from 0 to 7 meters;
- Tracking angle range – 110°;
- Supply voltage - 4.5-6 V;
- Operating current - up to 0.05 mA;
- Temperature regime – from -20° to +50°С;
- Adjustable delay time from 0.3 to 18 s.
The module on which the infrared motion sensor is installed includes additional electrical wiring with fuses, resistors and capacitors.
The principle of operation of the motion sensor on the Arduino is as follows:
- When the device is installed in an empty room, the radiation dose received by each element is constant, as is the voltage;
- When a person appears in the room, he first of all enters the viewing area of the first element, on which a positive electrical impulse appears;
- When a person moves around the room, thermal radiation also moves with him, which hits the second sensor. This PIR element already generates a negative pulse;
- Multidirectional pulses are registered by the electronic circuit of the sensor, which concludes that there is a person in the field of view of the Pir-sensor Arduino.
 For reliable protection against external noise, temperature changes and humidity, the elements of the Pir sensor on the Arduino are installed in a sealed metal case. On the top of the case in the center is a rectangle made of a material that transmits infrared radiation (most often based on silicone). Sensing elements are installed behind the plate.
Wiring diagram for motion sensor to Arduino
 Connecting a Pir sensor to Arduino is not difficult. Most often, modules with motion sensors are equipped with three connectors on the back. The pinout of each device depends on the manufacturer, but most often there are corresponding inscriptions near the outputs. Therefore, before connecting the sensor to the Arduino, you need to familiarize yourself with the notation. One output goes to ground (GND), the second provides the required signal from the sensors (+5V), and the third is a digital output from which data is taken.
Pir sensor connection:
- "Earth" - on any of the Arduino GND connectors;
- Digital output - to any digital input or output of Arduino;
- Power supply - + 5V on Arduino.
The diagram for connecting an infrared sensor to Arduino is shown in the figure.
Program example
The sketch is a program code that helps to check the operation of the motion sensor after it is turned on. In its simplest example, there are many drawbacks:
- The probability of false positives, due to the fact that it takes one minute for the sensor to self-initialize;
- Lack of output devices of executive type - relays, sirens, light indications;
- A short time interval of the signal at the output of the sensor, which must be delayed at the software level in case of movement.
These shortcomings are eliminated by expanding the functionality of the sensor.
The simplest type of sketch, which can be used as an example of working with an Arduino motion sensor, looks like this:
#define PIN_PIR 2 #define PIN_LED 13 void setup() ( Serial.begin(9600); pinMode(PIN_PIR, INPUT); pinMode(PIN_LED, OUTPUT); ) void loop() ( int pirVal = digitalRead(PIN_PIR); Serial. println(digitalRead(PIN_PIR)); //If motion detected if (pirVal) ( digitalWrite(PIN_LED, HIGH); Serial.println("Motion detected"); delay(2000); ) else ( //Serial.print(" No motion"); digitalWrite(PIN_LED, LOW); ) )
Possible options for projects using a sensor
PIR sensors are indispensable in those projects where the main function of the signaling is to determine the presence or absence of a person within a certain workspace. For example, in places or situations such as:
- Turning on the light in the entrance or in front of the front door automatically, when a person appears in it;
- Turning on the lighting in the bathroom, toilet, corridor;
- An alarm is triggered when a person appears, both indoors and in the local area;
- Automatic connection of security cameras, which are often equipped with security systems.
Pir-sensors are easy to operate and do not cause difficulties when connecting, have a large sensitivity zone and can also be successfully integrated into any of the Arduino software projects. But it should be borne in mind that they do not have the technical ability to provide information about how many objects are in the coverage area, and how close they are to the sensor, and they can also work on pets.
This article describes the creation of a motion sensor based on modules with a passive IR sensor. There are many models of modules with a PIR sensor from different manufacturers, but they are based on the same principle. They have one output that gives a low or high signal (depending on the model) when motion is detected. In my project, the PIC12F635 microcontroller constantly monitors the logic level at the output of the sensor module and turns on the buzzer when it is high.
Theory
Some crystalline materials have the property of generating a surface electrical charge upon contact with thermal IR radiation. This phenomenon is known as pyroelectricity. Passive modules with IR sensor work on the basis of this principle. The human body radiates heat in the form of infrared radiation with a maximum wavelength of about 9.4 microns. The appearance of a person creates sudden changes in the IR range of the environment, which is perceived by the pyroelectric sensor. The PIR sensor module has elements that amplify the signal to match the logic levels. Before starting work, the sensor needs from 10 to 60 seconds to get acquainted with the environment for further normal functioning. During this time, movements in the field of view of the sensor should be avoided. The sensor operates at a distance of up to 20 feet and does not respond to natural environmental changes associated with the passage of time. At the same time, the sensor reacts to any sudden change in the environment (for example, the appearance of a person). A model with a sensor should not be placed near batteries, sockets and any other objects that quickly change their temperature, because. this will result in a false positive. Modules with a PIR sensor usually have 3 pins: Vcc, Output and GND. The pinout may differ from manufacturer to manufacturer, so I recommend checking the documentation. Also, the output value can be indicated directly on the board. There are no such markings on my sensor. It can operate on a supply voltage of 5 to 12V and has its own built-in voltage regulator. In the presence of motion, the output of the sensor appears a high logic level. It also has a 3-pin jumper for setting the operating mode. The side contacts are labeled H and L. When the jumper is in the H position, when the sensor is triggered several times in a row, its output remains high. In position L, a separate pulse appears at the output each time the sensor is triggered. The front of the module has a Fresnel lens to focus the IR radiation onto the sensor.

Scheme and design
The motion sensor circuit is quite simple. The device is powered by 4 AA batteries that provide 6V. On the diode, which is used as protection against incorrect power connection, the voltage drops to 5.4V. I tested the circuit with a 4.8V NI-MH battery and it worked, but I recommend using 1.5V alkaline batteries for best performance. You can also use 9V batteries, but then you need the LM7805 stabilizer. The output from the module is controlled by the PIC12F635 microcontroller through the GP5 port (pin 2). When moving, a voltage of about 3.3 V appears at the output of the sensor. This voltage is recognized by the microcontroller as a high logic level, but I preferred to use this voltage to control the BC547 NPN transistor, the collector of which was connected to the microcontroller. When the transistor is closed, its collector is logic high (+5V). When moving, a high logic level appears at the output of the module, which saturates the transistor and the voltage on its collector drops to a low logic level. The jumper on the sensor is in the H position, so the sensor output will remain high until motion stops. The PIC12F635 microcontroller uses an internal clock generator running at 4.0 MHz.

The LED connected to the GP4 port via a current-limiting resistor flashes 3 times when power is connected. An EFM-290ED piezo buzzer connected to the GP2 port indicates the presence of movement. The piezoelectric buzzer produces the loudest possible sound at its resonant frequency. The buzzer I used has a resonant frequency of 3.4 ± 0.5 kHz. After experimenting with it, I found that it gives the maximum sound at a frequency of about 372 Hz. Although the documentation says that the operating voltage is from 7-12V, it also works from 5V.

Program
The program is written in C and compiled in for PIC. When power is applied, the LED flashes three times, indicating a successful start. After that, the microcontroller waits 60 seconds before checking the value at the output from the sensor. This is required to stabilize the sensor. When the microcontroller detects the triggering of the sensor, it starts the piezo buzzer at a frequency of 3725Hz. MikroC has a built-in sound generation library (Sound_Play()). The buzzer beeps as long as the sensor senses movement. When the movement stops, the logic level at the output of the sensor changes, but the buzzer does not stop immediately, but for about 10 seconds it emits a sound at a frequency of 3570 Hz. If it detects motion again, it will start again at 3725 Hz. This project uses an internal oscillator running at 4.0 MHz, MCLR and watchdog off.
/* Project: PIR Motion Sensor Alarm (PIC12F635) Piezo: EFM-290ED, 3.7 KHz connected at GP2 PIR sensor module in retriggering mode Internal Clock @ 4.0 MHz, MCLR Disabled, WDT OFF */ sbit Sensor_IP at GP5_bit; // sensor I/P sbit LED at GP4_bit; // LED O/P unsigned short trigger, counter; void Get_Delay()( Delay_ms(300); ) void main() ( CMCON0 = 7; TRISIO = 0b00101000; // GP5, 5 I/P"s, Rest O/P"s GPIO = 0; Sound_Init(&GPIO,2 ); // Blink LED at Startup LED = 1; Get_Delay(); LED = 0; Get_Delay(); LED = 1; Get_Delay(); LED = 0; Get_Delay(); LED = 1; Get_Delay(); LED = 0; Delay_ms(60000); // 45 Sec delay for PIR module stabilization counter = 0; trigger = 0; do ( while (!Sensor_IP) ( // Sensor I/P Low Sound_Play(3725, 600); Delay_ms(500) ; trigger = 1; counter = 0; ) if (trigger) ( Sound_Play(3570, 600); Delay_ms(500); counter = counter+1; if(counter == 10) trigger=0; ) )while(1) ; ) // End main()
Device photo:

List of radio elements
| Designation | Type | Denomination | Quantity | Note | Shop | My notepad |
|---|---|---|---|---|---|---|
| MK PIC 8-bit | PIC12F635 | 1 | To notepad | |||
| bipolar transistor | BC547 | 1 | To notepad | |||
| Resistor | 1 kOhm | 1 | To notepad | |||
| Resistor | 10 kOhm | 1 | To notepad | |||
| Resistor | 470 ohm | 1 | To notepad | |||
| Light-emitting diode | 1 |
PrincipleworkPIR (Passive Infra Red)-sensors
Any object with a certain temperature becomes a source of electromagnetic (thermal) radiation, including the human body. The wavelength of this radiation depends on temperature and is in the infrared part of the spectrum. This radiation is invisible to the eye and is captured only by sensors. They are also called PIR sensors.
This is an abbreviation for the words "passive infrared" or "passive infrared" sensors. Passive - because the sensors themselves do not emit, but only perceive radiation with a wavelength of 7 to 14 µm.
The person radiates warmth. Its infrared thermal image shows the temperature distribution over the surface of the body. Hotter objects look lighter, colder objects look darker, because. radiate less heat.
The PIR sensor contains a sensitive element that reacts to changes in thermal radiation. If it remains constant, no electrical signal is generated.
In order for the sensor to respond to movement, special lenses (Fresnel lenses) are used with several focusing areas, which break the overall thermal picture into active and passive zones arranged in a checkerboard pattern. A person, being in the field of operation of the sensor, occupies several active zones in whole or in part.
Therefore, even with minimal movement, there is a movement from one active zone to another, which triggers the sensor. The background thermal picture, as a rule, changes very slowly and evenly. The sensor does not respond to it. The high density of active and passive zones allows the sensor to reliably detect the presence of a person even with the slightest movement.
In rare cases, modern alarm systems do without sensor components. It is sensitive sensors that allow you to detect alarming signs according to certain indicators. In home security systems, such tasks are performed by light detectors, window impact sensors, leak detection devices, etc. But when it comes to the security function, the PIR motion sensor, which works on the principle of infrared radiation, comes first. This is a miniature device that can itself act as an indicator of the status of the serviced area or be part of a general security complex. As a rule, the second option for using the sensor is chosen as the most effective solution.
General information about the sensor
Almost all are designed to detect strangers in the room. The classical security system assumes that the sensor will record the fact of an intrusion into the controlled area, after which the signal will be sent to the control point and then certain measures will be taken. Most often, a signal is sent in the form of an SMS message to the control panel directly to the security service, as well as to the owner's phone. In this case, one of the varieties of such devices is considered - a pyroelectric PIR sensor, which is characterized by high efficiency and accuracy. However, the quality of the function of such models depends on many factors - from the chosen scheme for integrating the sensor into the security complex to the external conditions of influence on the structure with sensitive filling. It is also important to note that motion sensors are not always used as a tool to protect against an intruder. It can be installed for automatic control of individual sections. In this case, for example, the device will be activated when the user enters the room and also turn off when he leaves it.
Principle of operation
To understand the specifics of the operation of this device, it is worth referring to the features of the reactions of some crystalline substances. The sensitive elements used in the sensor provide the effect of polarization at the moments when radiation falls on them. In this case, we are talking about the human body. With a sharp change in the characteristics in the observed zone, the strength in the electric field of the crystal also changes. Actually, for this reason, the PIR infrared sensor is also called pyroelectric. Like all detectors, such devices are not perfect. Depending on the conditions, they may respond to false signals or not determine the target phenomena. However, in terms of the combination of operational properties, in most cases they justify their use.
Main characteristics

The main performance indicators that the consumer should consider relate to the range of the device and the ability to work autonomously. As for the parameters for coverage ranges, the controlled zone, as a rule, is 6-7 m. This is enough when it comes to protecting a private house, and even more so an apartment. Some models also provide a microphone function - in this part it is also important to determine the range, which can reach up to 10 m. At the same time, the PIR sensor can have a direct or autonomous power supply. If you plan to organize a security system, then it is better to purchase models with built-in batteries that do not require wiring. Next, the time is determined during which the device will be able to maintain its function without recharging. Modern models do not require a large energy supply, therefore, in a passive state, they can work for about 15-20 days.
Device design

The body of the sensors is usually made of metal. Inside there are two crystals - these are the elements sensitive to thermal radiation. An important design feature of detectors of this type is a kind of window in a metal shell. It is designed to allow radiation in the desired range. Such filtering is just designed to improve the accuracy of the crystals. An optical module is also located in front of the window in the housing, which forms the necessary wave pattern. Most often, the PIR sensor is supplied stamped on plastic. A field-effect transistor is also used to process electrical signals and cut off interference. It is located near sensitive crystals and, despite the task of cutting off interference, in some models it can reduce the efficiency of the crystal function.
GSM system in sensor
This optional can be called redundant, although there are many adherents of this concept. The essence of combining the function of detecting movement by means of a sensor and a GSM module is due to the desire to have a complete autonomy of the device. As noted above, the sensor communicates with the central control panel, from which a signal is subsequently sent to the operational security complex or to the phone of the direct owner. If a PIR motion sensor with a GSM system is used, then an alarm signal can be sent instantly at the moment of registration of the fact of penetration. That is, the stage of forwarding the signal to the intermediate controller is skipped, which sometimes allows you to win a few seconds. And this is not to mention the increase in reliability due to the elimination of additional links in the message transmission chain. What is the disadvantage of this solution? Firstly, it completely relies on the operation of GSM communication, which, on the contrary, reduces the reliability of the system, but for a different reason. Secondly, the presence of the module as such negatively affects the operation of the sensitive element - accordingly, the accuracy of fixing the penetration decreases.
Software

In complex security systems, where intelligent controllers with a high degree of automation are used, one cannot do without sensor programming tools. Manufacturers usually develop special ready-made programs with an extensive set of operating modes. But if possible, the user can create his own algorithm for the operation of the sensor in certain conditions. It can be integrated through the official software that comes with the hardware. Usually, in this way, the scheme of the device's action is set up at the moments of fixing an alarm - for example, an algorithm for sending messages is prescribed if the model has the same cellular communication module. On the other hand, home non-security LED PIR sensors are common, reviews of which note the effectiveness of informing about the operation of individual components of the lighting system. Each device has a microcontroller that is responsible for the actions of the device in accordance with the embedded commands.
Sensor installation
The physical installation of the sensor is carried out with the help of complete clamps. Usually, brackets or self-tapping screws are used, which fix not the detector body itself, but the structure into which it is initially integrated. In fact, this is an additional frame with holes provided for twisting. But the main thing in this part of the work is to correctly calculate the position of the sensor. The fact is that the PIR infrared motion sensor is most sensitive in situations where an object with thermal radiation crosses the control field from the side. Conversely, if a person is heading straight for the device, then the ability to capture the signal will be minimal. Also, do not place the device in places that are constantly or periodically subject to temperature fluctuations due to the operation of heating equipment, opening doors and windows, or a working ventilation system.
Sensor connection

The device must be connected to the main relay of the controller and the power supply system. A typical machine has a board with terminals dedicated to the power supply. The most commonly used source with a voltage of 9-14 V, and the current consumption can be 12-20 mA. Typically, manufacturers indicate electrical specifications by marking the terminals. The connection is carried out according to one of the standard schemes, taking into account the features of the operation of a particular model. In some modifications, it is possible to connect a PIR sensor without wiring, that is, directly to the network. These are in some way combined structures that are installed in open areas and control the same lighting systems. In the case of installing a security sensor, this option is unlikely to be appropriate.
Nuances of operation
Immediately after installation and connection, you should set the device to the optimal operating parameters. For example, sensitivity strength, radiation coverage range, etc. can be adjusted. In the latest programmable modifications, it is also possible to automatically correct the sensor's operating parameters depending on operating conditions. So, if you connect a PIR sensor to a central controller connected to thermostats, then the sensitive element will be able to vary the limits of critical radiation indicators based on the received temperature data.

Sensor in the Arduino system
The Arduino complex is one of the most popular home automation control systems. This is a controller to which light sources, multimedia systems, heaters and other household appliances are connected. The sensors in this complex are not final functional devices - they only serve as indicators, depending on the state of which the central unit with a microprocessor makes one or another decision in accordance with the underlying algorithm. The Arduino PIR sensor is connected through three channels, including the output and power lines with different polarities - GND and VCC.
Popular PIR Sensor Models
Most sensors are mainly produced by Chinese manufacturers, so you should prepare for problems with electrical stuffing. You can buy a truly high-quality sensor only in combination with controllers. Nevertheless, many people praise the PIR MP Alert A9 motion sensor, which, although it represents the budget segment, is distinguished by a decent assembly and good working qualities. Models such as the Sensor GH718 and HC-SR501 are also interesting in their own way. These are open-type sensors that can be easily disguised or included in the complex of the same controller. As for operational properties, the coverage radius of the described models is 5-7 m, and the battery life is an average of 5 days.
How much does the device cost?
Compared to the price tags of modern alarm equipment, the sensor looks very attractive. In total for 1.5-2 thousand rubles. you can buy a high-quality model and even with extended equipment. On average, a simple PIR sensor is estimated at an amount not exceeding 1 thousand. Another thing is that reliability and durability in this case are out of the question. At the same time, you should not think that this component will be inexpensive as part of an integrated security system. Even the security of a small private home may require the use of a dozen of these sensors, each of which will also require auxiliary equipment for installation and connection.
Conclusion

The entry of sensory components into security systems has radically changed how they work. On the one hand, the detectors made it possible to raise the security of the serviced object to a new level, and on the other hand, they complicated the technical infrastructure, not to mention the control system. Suffice it to say that it fully reveals its capabilities only if it is programmed for automatic operation. Moreover, it interacts not only with direct intrusion signal recorders, but also with other sensitive elements that increase its effectiveness. At the same time, manufacturers strive to facilitate the tasks of the users themselves. To do this, wireless devices are being developed, sensor control modules are being introduced using smartphones, etc.