Today, photographers have a whole arsenal of tools at their disposal - modern digital cameras, lenses, additional equipment and, of course, filters.
They are different and are used depending on the specific situation and the task that the photographer sets for himself.
Deserves special attention polarizing filter for lens. Every good specialist has it. Install it on the lens on a sunny day to eliminate glare from non-metallic surfaces.
The colors become more saturated, the brightness of the blue sky is smoothed out. It also manages to get rid of haze when photographing objects from a distance and from the glare of glass and water when shooting reservoirs. The position of the filter can be adjusted to get the desired shades in the photo, which cannot be achieved through processing.
All manufacturers can find at first glance the same filters, but at different prices. The cheapest ones are a glass light filter in a thick frame.
More expensive models have a thin frame that eliminates vignetting when used on wide-angle equipment. Experts recommend not to save on this device and advise you to purchase a quality product that will last a long time.
The use of a polarizing filter allows you to block or transform polarized light that reflects off shiny surfaces. 
To do this, a film is placed between two glass lenses. By turning the upper ring of the filter, you can adjust the degree of blocking of light polarization.
 Working with and without a polarizing filter
 According to the effect on the image, the filters are divided into:
- general purpose,
- changing color,
- combined with other filters,
- specific color enhancers.
General purpose polarizing filters are classified into two categories - linear and circular polarizing filters (another name is circular).
With the advent of the "figure" linear models have practically left the market, however, the effect of their use is no worse than that of circular ones.
For digital cameras equipped with autofocus, the use of circular polarizing filters is recommended. It consists of two frames that rotate relative to each other to achieve the desired effect.
VIDEO REVIEW
- do not use on super wide-angle lenses, as it will be difficult to achieve uniform polarization,
- the subject should be at a right angle to the photographer, this will allow you to get the maximum effect; if the sun is behind or in front, the result of using the filter will be minimal,
- the effect will not be in diffused lighting, for example, on a cloudy day,
- installing this type of filter on top of another can give a vignetting effect, reduce light transmission,
- shooting through glass, such as window glass, can give unpredictable results.

What to look for when buying - which polarizing filters are better
Quality filters are not cheap. So, experts do not recommend spending money on devices costing less than one and a half thousand rubles.
Moreover, if you use different lenses, another problem arises - either buy a filter for each of them, or use an adapter. The easiest way out of the situation is to decide on the object you use most often and buy a device just for it.
To get started, select the desired type of device - linear or circular. The second is required for digital cameras with autofocus.
It is important to pay attention to the materials from which the device is made. Look through it at the sky or a computer screen. Cheap devices will give interference in the form of a cloudy picture, an odd image. This will especially affect the quality of the photo when shooting on a camera with a high-quality matrix.
Ask the seller for several models and take the same shots to compare the result at maximum magnification.
For good SLR cameras, devices are selected by diameter, it is indicated by the manufacturer on the packaging and on the device itself.
By manufacturers, filters can be conditionally divided into the following categories:
- leaders: B+W Nano, Marumi Super DHG, Hoya Super HMC,
- medium quality: B+W Pro, Marumi DHG, Hoya HMC,
- waterproof: B+W, Hoya HD, Marumi WPC CPL,
- standard - as a rule, all of poor quality.
Devices of average quality at a more affordable price can retain almost all the properties of the favorites. In particular, it is worth noting the products of Marumi. With high quality, their price remains quite democratic. However, they do not offer innovative solutions, but simply make good filters for constant use.
But among the most best polarizing filters experts distinguish the following:
- Marumi DHG Super CPL . It has an ultra-thin frame, so it can be used even for 16mm lenses. It quickly gets dirty, and sometimes it is difficult to clean it, but it solves its tasks confidently. Production is located in Japan. It is worth noting that Japanese companies are confidently pushing German manufacturers, who were the undisputed leaders not so long ago.
- Carl Zeiss T POL Filter . They feature a thin frame, light weight, lightweight design. The cost is quite high, but it is justified by the excellent quality.
- Hoya Super HMC. The main drawback is the lack of thread, which makes it impossible to use them simultaneously with other types of filters.
- B+W KSM Nano . The manufacturer uses an additional eighth layer without disturbing the color balance and light transmission. They are also equipped with a hydrophobic coating, which ensures that drops of moisture roll into balls and remove them from the glass. The brass frame reduces the risk of the device sticking to the lens.
Thus, if you are not a professional, you can stop at mid-range models that, at an affordable price, will provide the highest image quality.
Companies producing DVRs are trying to attract the attention of buyers with various innovations - a GPS and Wi-Fi module, a G-sensor, and not so long ago, equipment was also equipped with polarizing filters. They are installed, as a rule, separately, and are not included in the kit. Mounted on a magnet or threaded connection.
Designed to eliminate glare, reflections from the windshield. The picture is clearer and richer. This is especially critical in bright sunny weather, while on a cloudy day and in the evening the result may be the opposite, so in such a situation it is better to remove the device.
VIDEO
Purchase polarizing filter for Mia DVRs and other brands will improve image quality, which can be critical in the event of an emergency and further viewing of the recording with traffic police officers.
Agree, it will be a shame if the number of the culprit of the accident turns out to be unreadable due to sun glare or it will not be possible to consider other details of what happened on the road.
In this article, we will not delve into the depths of physical processes and briefly consider what a polarizing filter is.
It is difficult to imagine a good, rich, landscape photograph that was taken without processing. However, this effect can be achieved using polarizing filters.
Polarizing filter consists of two crystals (polarizers), which are processed in a special way. They can rotate relative to each other. The degree of polarization is adjusted by rotating one crystal. This can remove glare from water or glass. Another useful feature of the filter is to give the pictures more saturation and clarity. The clouds will become clearer, the sky will be bluer, the grass will be greener, etc.
Types of polarizing filters.
On sale you can find only two types of PL filters, which differ in the method of polarization - this is a linear, PL filter and a circular, CPL filter. Linear filters are more suitable for cameras with manual focus. Circulating filters are designed for autofocus cameras. The price of CPL filters is higher than PL. However, circulation filters have the advantage that they will not interfere with the camera's autofocus and metering. Special Wide-CPL filters with a narrow frame have been developed for wide-angle lenses. They allow you to save pictures from vignetting. There are filters that are coated with a special water-repellent layer that does not interfere with the focus and metering of the camera.
Using a filter.
Having wound the filter on the lens, you just need to rotate one crystal. Having achieved a result in which glare disappears, you can safely start shooting. The result can be seen in the examples.


Naturally, the use of the filter has its limitations.
1) Rotating the filter should take into account that the maximum effect is achieved in the range of 90 degrees from the initial position. Rotating the filter 180 degrees will return it to its original value.
2) The use of polarizing filters reduces the light output, which causes the need for exposure compensation by one or even two stops.
Not so long ago, a desire arose in me to slightly ennoble my Nikon D3000 and order an appropriate lens hood with a diameter of 52 mm for it. The main task of this overlay on the lens is to correctly cut off the light, in addition, this thing indirectly serves as protection for the lens from bumps and scratches. It so happened that I made the purchase remotely via the Internet, and buying a lens hood separately was not as profitable as ordering a whole set: three filters per lens, four false lenses, a lens hood and a protective cover.
Two weeks later my parcel arrived, but the fact is that before this purchase I had not had to use filters, and the knowledge of what they were for was purely theoretical. Today I invite you to see with me what happens when shooting with various filters, and together figure out what they are for.
Popular lens filters
Polarizing filter
The first filter I would like to talk about is polarizing. You can see it in the photo below.
Polarizing filters are the most commonly used in digital photography. These filters are abbreviated as PL (CPL, LPL) and their main task is to reduce the amount of reflected light that hits the camera sensor. Polarizing filters reduce the brightness of photos and increase their saturation.

There are two types of polarizing filters: circular (CPL) and linear (LPL). Linear polarizing filters reduce polarizing light less effectively than circular ones, but they can be placed at any angle, while circular polarizing filters must be placed at right angles to the optical axis.

Circular (circular) filter is a system of two mandrels: mandrel with glass + mandrel. The mandrel with glass rotates freely, and by turning it at a certain angle, we manage to achieve the desired effect.

However, polarik should be used with care and skill. Do not use it as a protective filter for the lens and wear it without removing it. A polarizing filter can have a negative effect on the image, as it steals light a lot - increasing the risk of blurring photos when shooting without a tripod.
FLD filter (fluorescent light filter)
The second light filter that came with the kit is the FLD filter. It has a bright purple hue.

What is it for? It reduces or completely eliminates the unpleasant greenish tint that appears in pictures where fluorescent lights appear.

You can use it when shooting cityscapes at night. FLD filters were originally created for shooting with film cameras, and they are not needed for digital photography, especially in RAW format. So I won't be using this filter.
UV filter
The third and final filter included is the UV filter.
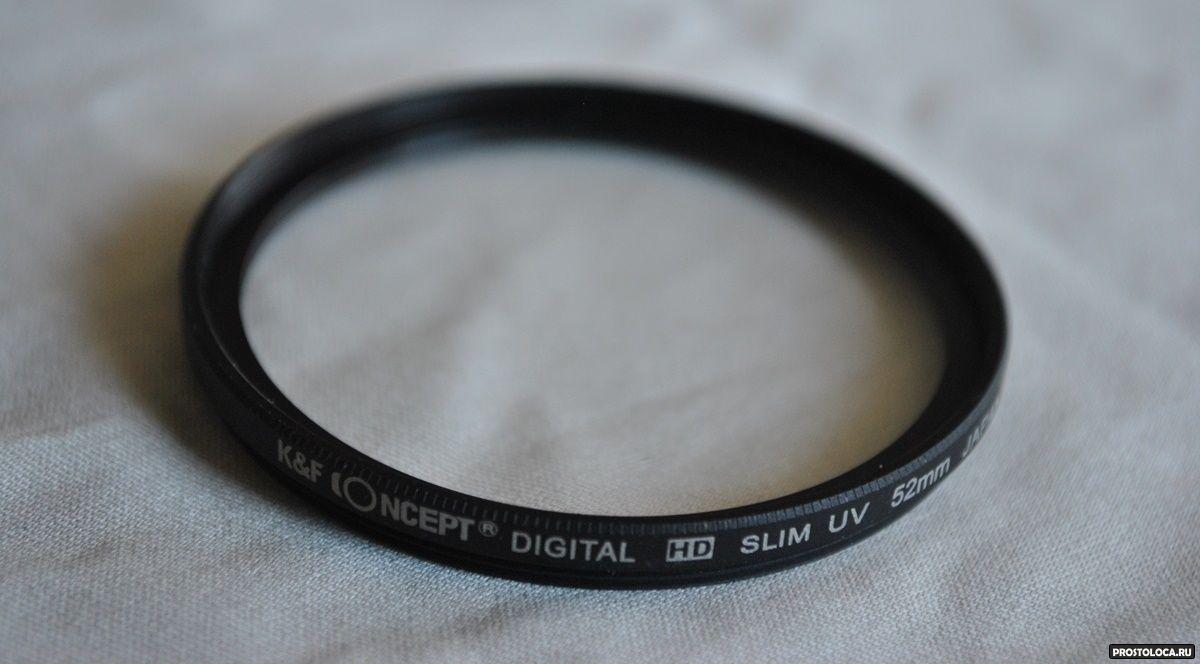
The UV filter is most commonly used today as a protective filter. The UV filter has no effect on the image (ideally) and can be used during any type of shooting. On film cameras, a UV filter increases contrast and reduces haze, but in the era of digital photography, almost no one shoots with such cameras.
It is very important that the UV filter is of good quality and kept clean, as it can significantly degrade image quality and add unwanted reflections.
Should I use a UV filter? If you are the owner of an expensive lens, it is desirable to have such a protective filter, because it is easier to replace it than to repair the lens. If your camera is amateur, then you should think about the advisability of using it.
To summarize: of the three filters included in the kit, the most necessary is a polarizing filter, the most commonly used is a protective UV filter, and the useless one is a FLD filter.
Today we will talk about light filters. These are little photographer's assistants that cling to the lens. Of course, in our digital age, post-processing works wonders, but in some cases, filters will be indispensable helpers. Before the advent of digital, there were a great many different filters, they helped to do what programs are doing now, and now the need for most of the filters has disappeared. But nevertheless, there are 3 common filters that are still relevant:
- Protective filter - UV or ultraviolet filter
- Polarizing filter
- ND filter
Let's take a closer look at these three types. To understand what is what and why.
Protective filters - UV and company.
In general, there is confusion with this category. Technically, 4 different filters can be distinguished in this group. Neutral colorless (Neutral), ultraviolet (UV), SkyLight filters and Haze filter. The purpose of this group of filters is the same - to protect the lens from mechanical damage, ultraviolet light (matrices and film are much more sensitive to it than our eyes) and from "haze" when shooting at long distances. The most common are UV and Skylight.
The Skylight is usually more expensive, and sellers like to pitch it as "the best", but in fact, its pinkish glass was intended to add "warmth" to the shot taken on film. In digital, this effect is practically reduced to zero by the presence of such a thing as white balance, so I personally don’t see the point in overpaying for Skylight for a digital camera.
No matter what manufacturers write and sellers in stores say, the main purpose of protective filters is purely mechanical protection of the lens. UV filter allows
- Protect lens from dust and sand
- Protect the front lens from scratches, fingerprints, bumps, etc.
- Protect the "brow" at the end of the lens (for winding filters) from bending in case of accidental impact on the lens
- Protect the front lens from rain, sea salt water spray, etc.
Protective filters are the most inexpensive, and you can buy a filter for each lens, but do not forget that any filter is an obstacle to the path of light. Therefore, you should not chase for cheapness and you should buy a protective filter from a good manufacturer, made of high-quality glass with high light transmission. By the way, for the same reason, when using, for example, a polarizing filter, it is better to remove the protective filter immediately, rather than arrange a pyramid of filters at the end of the lens.
Polarizing filter
A polarizing filter, also known as a polarizer, is an extremely useful thing, in fact a must have for any self-respecting photographer. What is he doing? In general, it removes glare and reflections from non-metal surfaces. On a sunny day, it can also "darken" the sky, making it more textured, although in fact it simply removes the reflection of light from the small droplets of water and moisture present in the atmosphere.

In addition, the polarizing filter "steals" the light. It can steal 1 to 2 stops from you, depending on the quality of the filter itself. Accordingly, when using a polarizer, you may need to enter exposure compensation, and in low light a tripod will simply be needed.
In addition to all of the above, a polarizing filter can significantly improve the colors in a photograph, making them immediately the same as you often do them later in Photoshop or another graphics editor. The reason is the same, the removal of reflections from some objects. Reflection in this case is not what we see in the mirror, but any “reflection”.
Some examples from the series without filter and with filter


Below is a classic example of using a polarizer made by Hoya back in the last century.

Polarizing filters are circular and linear. There is no point in describing the difference between them, since manufacturers unambiguously recommend circular for a digital camera with autofocus and other functions. The circular filter is a system of two mandrels, one of which (with glass) rotates freely relative to the second. Rotating the mandrel with glass you achieve the desired effect.
The downside is that a good polarizing filter is not cheap at all. And given that the diameter of the lenses usually varies (and the diameter of a suitable filter, respectively), respectively, you either need a separate filter for each lens or a bunch of adapter rings. The easiest way out of this is to understand which lens you use most often in those situations in which you need a polarizer and buy a filter just for it.

In addition, inexpensive Chinese NoName filters have now appeared on the market, which are not worth buying at all. I would not recommend looking at filters cheaper than 1500r (~$50) at all - you run the risk of just throwing away money.
A few tips for using a polarizing filter:
- Do not use a polarizing filter on ultra-wide angle lenses as it will be difficult to achieve uniform polarization. The limit lies at a focal length of approximately 28mm. For the same reason, it is better not to use it when shooting blanks for panoramas.
- The greatest effect can be achieved when the light source is at 90 degrees from the photographer-subject line. If the sun is in front or behind, the effect will be minimal.
- In diffused light, a polarizing filter will be useless. For example, when shooting a landscape on an overcast day
- If you wind a polarizing filter on top of another, you can get significant vignetting and further reduce light transmission.
- Do not take pictures through glass or other transparent surfaces, as you may get unpredictable effects, as in the picture below.

Neutral gray filter.
A neutral gray filter, also known as Neutral Density or simply an ND filter, can be either simple or gradient. The purpose of this filter is to help the photographer make the right exposure. Sometimes it is necessary to minimize the amount of light entering the matrix through the lens.

On the one hand, this can be done by "squeezing" the diaphragm. But in this way it is not always possible to achieve the desired, and the hands are tied with a clamped diaphragm. The use of a neutral gray filter unties the hands. We can reduce the amount of light by the desired amount and at the same time freely choose any aperture.

Why is it necessary to reduce the amount of light? The most illustrative example is the “mystical water” effect. Surely you have seen pictures where the water in the sea or, for example, a waterfall, looks like a “milk river” and not like droplets frozen in flight. This effect can be obtained with a long exposure. And how do you shoot at shutter speeds, for example, a second or two on a bright day? This is where the ND filter comes in.

We put the desired filter and get the opportunity to "shoot during the day as at night."
In addition, we get the opportunity
- use wide apertures in bright light
- add blur to moving objects by "blurring" them
- get a shallow depth of field in very bright light.
A gradient filter is a kind of ND filter, only the darkening goes with a gradient, that is, ascending (or descending :)). When is it useful? Well, for example, when shooting a scene with a very high light contrast, so as not to get a “knocked out sky”.

The dark part of the gradient is in the sky, the light part is on the ground. As a result, we get the sky "not illuminated" since much less light hits the matrix in this place. True, the gradient filter has one drawback. It will ideally help only if we have a more or less clear and even border of illumination separation.
How to choose the right neutral gray filter? Neutral gray filters are again characterized by stops, the most popular filters are 1,2 and 3 stops. Although there are 10, it's up to you and your wallet.
So what is this animal anyway? As promised, there will be no theory and lessons in physics from the "Optics" section.
Today it is impossible to imagine photographing landscapes without polarizing filters. To make your landscapes look juicy and clear without additional processing, you need to use a polarizing filter.
Polarizing filter- this is a filter consisting of 2 rings in one of them there is a specially processed glass (polarizer), by rotating the ring with polarizing glass, you can adjust the degree of polarization. This filter allows you to remove glare from glass or water while shooting, retaining the reflected rays. The filter also allows you to get more saturated pictures, on which clouds will be more drawn, vegetation will look more juicy, here, everything is like with water, the air contains water particles that reflect light, hence the pictures without a filter are dull, not always blue sky, and "indistinct" clouds.
Types of polarizing filters.
There are two types of PL filters according to the polarization method: linear (PL) and circular (CPL). For most manual focus cameras, linear polarization filters are designed, for autofocus cameras, use circular (CPL) filters. CPL filters are a bit more expensive than linear filters for the price. But Circulars by no means stop the camera's autofocus and exposure metering from doing their job. Designed for wide-angle lenses, Wide-CPL filters with a narrow frame prevent vignetting (darkening at the corners of the frame). Some PL filters are protected with a water-repellent coating that does not affect the operation of autofocus and exposure controls.
Using a polarizing filter.
Just screw the filter of the required diameter onto the lens of your photo/video camera. By rotating the crystal in the filter, select the desired degree of polarization, which will allow you to remove glare from glass or water when shooting, as well as get a more saturated sky and whiter and fluffy clouds ..... enough words, look at examples.
But of course there are some restrictions on the use of such filters.
1) When rotating the polarizing filter, it must be taken into account that the expected zone of maximum effect will be approximately 90 degrees from the initial position. Rotating 180 degrees will return the image to its original state.
For example, if the sun is exactly above you, the polarization effect will be observed in the range (we are guided by the hands of a wrist watch) from 12 to 6 o'clock, and in the worst way it will manifest itself from 3 to 9 o'clock on the dial. Having tried it in practice, you will immediately understand everything.